

Securing an Estate Perimeter With Cameras: What Actually Works
The most reliable way to secure an estate perimeter is a layered camera system: overlapping fixed varifocal cameras along every boundary run, thermal cameras covering dark or foliage-heavy stretches, and PTZ cameras that slew to a location the moment a perimeter sensor trips. Power and data run over PoE or fiber, with battery or solar backup for gates, driveways, and detached buildings that sit off the main utility line. The goal isn’t just capturing footage. It’s building a verification chain where a sensor alarm triggers a camera confirmation, a human checks it, and someone responds appropriately. Perimeter CCTV design built this way turns a wall of footage into an actual early-warning system.
If you own or manage an estate, here’s what to do in the next 24 to 72 hours, before you call anyone for quotes:
- Walk the full boundary and mark every gate, driveway pause point, tree line, and detached structure (guesthouse, barn, pool house) on a simple site map.
- Note where power and network already exist, and where they don’t.
- Identify choke points, the spots where anyone entering the property has to pass through a narrow gap, like a gate or a single driveway lane.
- Write down which spots need identification quality footage (front door, garage, main gate) versus which just need general awareness (open pasture, tree lines).
- Hand this map and notes to your installer before the first site visit.
Three things matter more than anything else in the early planning stage:
- Cover choke points first. Gates, driveway pause zones, and detached structures see far more foot traffic from intruders than open fence lines.
- Set up identification shots deliberately. The front door and garage need footage sharp enough to identify a face or read a license plate, not just detect movement.
- Build a verification chain, not a camera collection. A sensor alarm should trigger a camera pop-up or PTZ movement that a person can check in seconds, not a pile of clips nobody watches until after the fact.
Key Takeaways
A properly designed estate perimeter camera system works because it verifies alarms through a sensor-to-camera-to-human chain rather than just recording footage no one watches in time.
| Point | Details |
|---|---|
| Verification chain first | Link sensors to cameras so alarms trigger a pop-up or PTZ slew, then a human check, before any response. |
| Prioritize choke points | Put identification-grade cameras at gates, driveways, and the front door before covering open fields. |
| Mount and overlap correctly | Set outdoor cameras at 8 to 10 feet, tilt 15 to 30 degrees down, and overlap fields of view by 10%. |
| Match infrastructure to distance | Use PoE for near locations, fiber for long runs, and solar/cellular for gates or detached structures off the grid. |
| Start with Safes and Security Direct | Source identification, PTZ, thermal, and off-grid camera hardware matched to your site survey before requesting an installer quote. |
Table of Contents
- What Is Perimeter Security, and Where Do Cameras Fit In?
- Which Camera Types and Perimeter Devices Do You Actually Need?
- How Do You Design Coverage and Run a Proper Site Survey?
- What Power, Network, and Storage Setup Does an Estate Perimeter Need?
- What Analytics and Integrations Actually Reduce False Alarms?
- What Installation and Maintenance Practices Keep the System Reliable?
- What Privacy and Legal Issues Should You Check Before Installing Cameras?
- What Drives the Cost of an Estate Perimeter Camera System?
- What Checklist Should You Hand Your Installer?
- Why Verification Beats Coverage on Every Estate We’ve Reviewed
- How Safes and Security Direct Helps You Build This System
- Sources
What Is Perimeter Security, and Where Do Cameras Fit In?
Perimeter security works in three stages: detect, verify, respond. Detection comes from sensors, motion triggers, fence vibration detectors, break-beam sensors, or the cameras themselves running analytics. Verification is where cameras earn their keep. A camera confirms whether that fence-line alarm is a raccoon or a person climbing over, and it does that faster and more accurately than a guard walking the property line. Response, the final stage, only works well when verification happened first.
Cameras on their own don’t stop anyone. What they do is give whoever’s watching, a monitoring service, a property manager, a homeowner’s phone, the information needed to decide whether a response is warranted. That distinction shapes almost every design decision in this guide.
Inside that framework, cameras play four distinct roles:
- Detection support, working alongside dedicated sensors to widen the net.
- Early verification, confirming or dismissing an alarm within seconds.
- Identification, capturing a face or license plate clear enough to use later.
- Deterrence, since visible, well-placed cameras change behavior before an incident starts.
When you’re evaluating hardware, look for a few trust signals that separate genuinely durable estate equipment from consumer-grade gear: an IP66 or higher ingress rating for weather resistance, an IK10 impact rating if the camera sits within reach at a gate or fence, and a clear PoE architecture that lets cameras and sensors talk to each other without relying on a dozen separate Wi-Fi connections.
Which Camera Types and Perimeter Devices Do You Actually Need?
Different stretches of a perimeter call for different hardware, and matching the wrong camera type to the wrong job is the single most common mistake we see in estate installs. A fixed camera aimed at a hundred-yard fence line will show you movement, but it won’t show you a face.
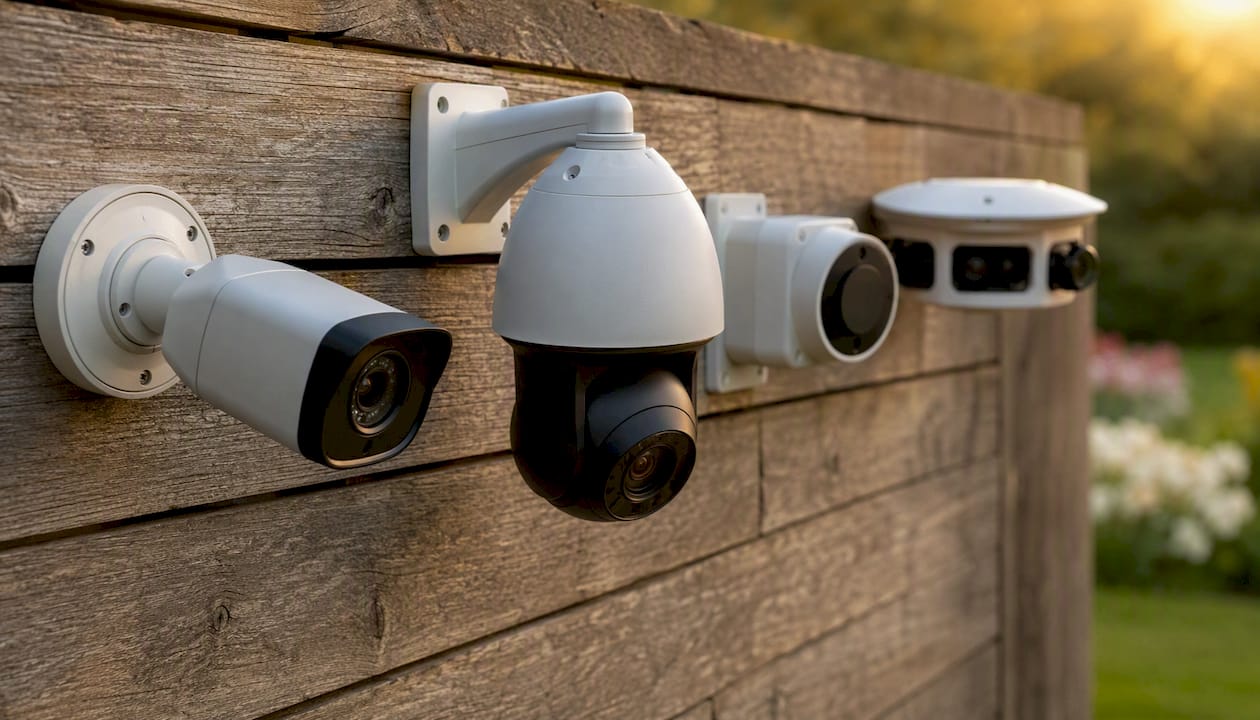
Fixed varifocal cameras handle long, straight fence or wall runs where the camera stays pointed at one area permanently. A varifocal lens lets you adjust the zoom during installation to match the exact distance you’re covering, which matters more on estates than standard suburban lots because sightlines run so much longer.
PTZ (pan-tilt-zoom) cameras earn their place at gates, driveways, and open areas where you need one camera to cover a lot of ground. The real value shows up in slew-to-cue setups: when a fence sensor or break-beam trips, the PTZ automatically swings to that exact spot and zooms in, giving a monitoring operator a live, targeted view instead of a static wide shot.
Thermal cameras solve the problem visible-light cameras can’t: total darkness, heavy foliage, or fog. They detect a heat signature well before a person is close enough for a standard camera to make out anything useful, which makes them the right call for tree lines, back pastures, or any stretch without reliable lighting.
Panoramic or multi-directional cameras give you situational overview, useful at a courtyard, main entrance, or wide open lawn where you want general awareness rather than a specific identification shot.
Cameras rarely work alone on a well-designed perimeter. Fence vibration sensors, infrared beam sensors, and ANPR (automatic number plate recognition) units at the main gate all feed alerts to the camera system, and the verification chain works because the camera confirms what the sensor flagged, not the other way around.
| Camera Type | Best Use Case | Detection Distance | Identification Distance |
|---|---|---|---|
| Fixed varifocal | Fence lines, straight runs | Long | Moderate to high, if properly zoomed |
| PTZ | Gates, driveways, wide open areas | High (with slew-to-cue) | High, once zoomed on target |
| Thermal | Dark areas, foliage, fog | Very high, day or night | Low, thermal shows heat, not faces |
| Panoramic/multi-directional | Courtyards, wide overview zones | Moderate | Low, wide field trades detail for coverage |
The rule of thumb: use thermal or wide-angle cameras to detect something is happening, then use a fixed or PTZ camera to identify who or what it is. Trying to make one camera do both jobs at estate distances almost always disappoints.
How Do You Design Coverage and Run a Proper Site Survey?
Good placement beats expensive hardware almost every time. A correctly positioned mid-range camera will outperform a poorly aimed premium one, and that single fact should guide how much time you spend on the survey before you spend a dollar on equipment.
Run the survey in this order:
- Walk the entire boundary and mark it on a simple map, noting fence type, terrain, and existing structures.
- Identify every choke point: gates, single-lane driveways, footbridges, or any spot someone has to pass through rather than around.
- Check sight lines from each proposed mounting point, and note trees, outbuildings, or terrain that could create a blind spot.
- Mark existing power and network infrastructure, and flag any locations more than 100 feet from either.
- Decide which locations need identification quality (front door, garage, main gate) and which just need detection and context (open fields, side yards).
- Photograph each proposed mounting location at the height and angle you’re considering, before committing to hardware.
For mounting itself, the numbers matter more than instinct. Outdoor cameras generally belong at 8 to 10 feet high, tilted 15 to 30 degrees downward, high enough to stay out of easy reach but low enough to still capture a recognizable face. For driveway and plate capture specifically, resolution matters: hitting roughly 40 pixels per foot at the capture point is what separates a readable plate from a blurry guess, and that’s a strong argument for 4K hardware on longer driveways rather than standard 1080p.
Pro Tip: Aim boundary cameras along the fence line, not straight out across your property. A camera pointed along the run catches anyone walking the perimeter looking for a gap; a camera pointed straight ahead only catches someone the moment they’re already inside your line of sight, which is usually too late.
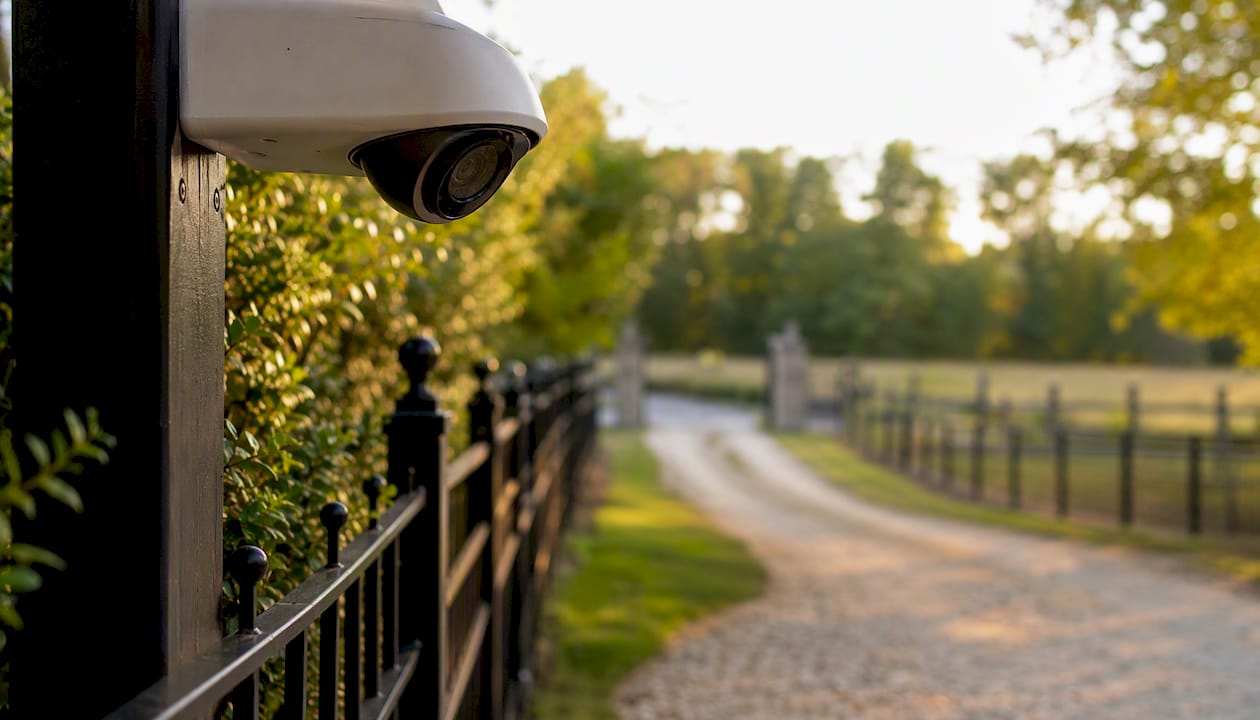
That same framing choice solves half your privacy headaches too. Angling cameras to watch your own boundary, rather than the street or a neighbor’s yard, keeps footage focused where it matters and avoids the awkward conversation about why your camera captures their back porch. For deeper guidance on angles and blind spots, our strategic security camera setup guide walks through placement scenarios in more detail. Roughly 34% of burglars still enter through the front door, which is reason enough to make sure that one location gets an identification-grade camera even if the rest of your perimeter runs lower-resolution hardware.
What Power, Network, and Storage Setup Does an Estate Perimeter Need?
Camera hardware is only half the system. The power, network, and storage backbone determines whether your cameras stay online, capture usable footage, and don’t collapse the first time a storm knocks out Wi-Fi to the back forty.
Power on an estate almost always means Power over Ethernet (PoE) for anything within reach of your existing network infrastructure, since it delivers power and data over one cable and simplifies installation dramatically compared to running separate electrical lines. For gates, guesthouses, or detached structures too far from the main run, solar-powered, cellular cameras fill the gap without trenching new cable across half an acre.
Network backhaul depends on distance. Fiber handles long runs (500 feet or more) without the signal degradation copper Ethernet suffers over distance, and it resists interference far better in areas with heavy electrical equipment. For genuinely remote points, gates a quarter mile from the main house, a detached barn, cellular backhaul or point-to-point wireless bridges cover the gap.
Storage comes down to local NVR versus cloud, and most estate systems benefit from both. A local NVR with adequate SSD or HDD capacity keeps footage on-site and accessible even if internet service drops, while cloud storage adds an off-site backup that survives a stolen or damaged recorder. Retention needs vary, but 30 days is a reasonable baseline for most estate applications, longer for cameras covering high-value structures or gates.
| Infrastructure Element | Best For | Key Consideration |
|---|---|---|
| PoE | Cameras within reach of existing network runs | Simplifies cabling, delivers power and data together |
| Solar + cellular | Gates, detached structures, remote points | No trenching, no Wi-Fi dependency |
| Fiber backhaul | Long driveway runs, distant structures | Minimal signal loss over distance |
| Local NVR (SSD/HDD) | On-site retention, no internet dependency | Sizing must match camera count and retention window |
| Cloud storage | Off-site backup, remote access | Ongoing subscription cost, bandwidth dependent |
Before you finalize the design, protect the investment: a UPS (uninterruptible power supply) keeps recorders and network switches running through a brief outage, surge protection guards against lightning strikes on long outdoor cable runs, and redundant backhaul, a cellular failover alongside your primary connection, keeps the system reporting even if the main line goes down.
What Analytics and Integrations Actually Reduce False Alarms?
Modern cameras do more than record. Analytics running either on the camera itself (edge processing) or on a central server sort real threats from wind-blown branches, and getting this tuning right is what separates a system that gets used from one everyone eventually ignores.
Common analytics worth prioritizing:
- People and vehicle detection, which filters out animals and weather from motion alerts.
- Thermal and visible-light fusion, pairing a thermal camera’s detection with a visible camera’s identification for a single, more useful alert.
- ANPR (automatic number plate recognition), logging every vehicle that passes a gate for later reference.
Edge processing (analytics run directly on the camera) reacts faster and doesn’t depend on network bandwidth, which matters for a slew-to-cue PTZ that needs to move the instant a sensor trips. Server-side processing handles more complex analytics across multiple cameras at once but needs more bandwidth and a capable NVR or server to run on. Most estate systems end up using a mix: edge processing for immediate detection and response, server-side for pattern recognition across the whole property over time.
Integration is where the verification chain actually comes together:
- Link fence and beam sensors directly to the camera system so an alarm triggers a specific camera or PTZ, not a generic notification.
- Configure PTZ slew-to-cue so the camera automatically points at the triggering sensor’s location within seconds.
- Route alarms into a VMS (video management system) that pops up the relevant camera feed for whoever’s monitoring.
- Connect monitoring, whether an in-house team or a third-party service, so a human reviews the confirmed alert.
- Add automated deterrence, lighting, tracking spotlights, or a recorded voice warning, that activates once a verified threat is confirmed. Estate-scale deterrence setups that pair spotlights with voice warnings close a lot of the nighttime visibility gap that plagues large properties.
Tuning matters as much as hardware. Set motion zones to focus on your actual boundary and entry points, exclude busy public roads or sidewalks from triggering alerts, and test those zones at different times of day since lighting changes dramatically shift what a camera flags as motion. Skipping this step is the number one reason perimeter systems generate so many false alarms that operators start ignoring them altogether, which defeats the entire purpose of building a verification chain in the first place.
What Installation and Maintenance Practices Keep the System Reliable?
Installation quality determines whether your system works reliably for years or starts failing within months, and a handful of details separate a professional install from a rushed one.
Start with the fundamentals: proper grounding on every outdoor camera and PoE run, surge protection at both ends of long cable runs, and tamper-resistant mounting hardware on any camera within reach from ground level or a fence. Mounting angle also affects night vision performance directly, a camera aimed too close to a wall or reflective surface will wash out its own infrared illumination, turning a night-vision camera into a useless white blur.
Before calling the job done, run through a commissioning checklist:
- Verify each camera’s actual field of view matches the design plan, photographed and documented.
- Test night vision at the actual mounting height and angle, not just on a bench.
- Trigger each perimeter sensor and confirm the linked camera pops up or the PTZ slews correctly.
- Check network throughput and packet loss across the full system, particularly on long cable or wireless runs.
- Confirm recorded footage actually saves and retains for the specified window, don’t assume, verify.
Once the system is live, a maintenance rhythm keeps it that way:
- Clean camera lenses every few months, faster in dusty or high-pollen areas.
- Update firmware on cameras, NVRs, and network switches on a regular schedule.
- Review alarm logs periodically to catch recurring false triggers before they become background noise.
- Run storage health checks on NVR drives, since a failing drive rarely announces itself until footage is already gone.
- Walk the property seasonally to check for foliage growth blocking sight lines and lighting changes as seasons shift.
For estates that need professional cabling or trenching as part of the install, working with a qualified low-voltage CCTV installer for the physical infrastructure work often saves more in avoided rework than it costs upfront.
What Privacy and Legal Issues Should You Check Before Installing Cameras?
Cameras aimed at a boundary line inevitably risk capturing more than your own property, a sidewalk, a neighbor’s yard, a public road, and that reality carries real legal exposure if handled carelessly.
The core principle in perimeter camera design is straightforward: frame cameras to watch your boundary line, not beyond it. Where a camera’s field of view unavoidably includes a neighbor’s private space or a public area with a reasonable expectation of privacy, apply a privacy mask to blank out that portion of the recording, and post signage where local rules require or recommend it.
Practical steps that reduce disputes and legal exposure:
- Angle cameras toward your own property line rather than across it wherever possible.
- Apply digital privacy masks to blank out any portion of a frame that captures a neighbor’s window, yard, or private space.
- Limit footage retention to what you actually need, indefinite storage of footage capturing public areas increases exposure with no added benefit.
- Secure remote access to camera feeds with strong authentication, since a breached camera system is a privacy failure of its own.
- Check whether your jurisdiction has specific rules about audio recording, many places treat audio capture more strictly than video.
Laws on surveillance, audio recording, and neighbor privacy vary significantly by state and even by county, so this is genuinely one area worth a quick consultation with local counsel rather than guessing. Our guide on recording law basics covers some foundational privacy considerations, though it doesn’t substitute for jurisdiction-specific legal advice on your particular setup.
What Drives the Cost of an Estate Perimeter Camera System?
Cost on an estate-scale system comes from a handful of predictable drivers, and understanding them helps you budget realistically instead of getting surprised mid-project.
The biggest cost variables:
- Camera type and sensor technology. Thermal cameras and 4K resolution units cost meaningfully more than standard 1080p fixed cameras.
- Cabling and trenching. Running fiber or Ethernet across long driveways or between structures often costs more in labor than the cameras themselves.
- PoE switches and recorders. Capacity needs to match camera count with room to grow, undersizing here creates expensive rework later.
- Mounting hardware and poles. Open areas without existing structures need dedicated poles, which adds material and installation cost.
- Monitoring or service fees. Ongoing costs for professional monitoring or cloud storage subscriptions add up over a system’s lifetime.
- Labor. Estate-scale installs, especially with trenching or pole installation, run higher labor hours than a standard residential job.
| System Role | What It Typically Requires | Relative Cost Level |
|---|---|---|
| Entry identification camera | High-resolution fixed camera, good lighting | Moderate |
| Driveway long-range camera | 4K resolution, varifocal or PTZ lens | Moderate to high |
| Thermal + visible fusion pair | Thermal camera paired with fixed camera | High |
| PTZ on a pole (remote area) | Pole, PoE run or solar, PTZ camera | High |
Estate installs commonly land in the six to eight camera range for typical properties, and eight or more for larger gated estates, though the right number depends entirely on your boundary length and choke-point count from the site survey.
Scale sensibly rather than trying to build the whole system at once. Start with identification cameras at the front door and driveway choke points, since those deliver the most security value per dollar. Build infrastructure with room to grow: extra PoE switch ports, spare NVR storage capacity, and fiber runs sized for future cameras rather than just today’s count. Adding a camera to a system built with headroom costs a fraction of what it costs to upgrade undersized infrastructure later. For guidance on matching hardware to your specific risk profile, see our breakdown of choosing cameras by risk level.
What Checklist Should You Hand Your Installer?
A well-prepared checklist turns a vague conversation into a concrete quote, and it protects you from an installer guessing at requirements you never actually specified.
Give your installer this information before the quote:
- A site survey map marking boundaries, choke points, existing structures, and power/network locations.
- Camera count and type needed at each location (fixed, PTZ, thermal, panoramic).
- Exact mounting height and tilt angle planned for each camera.
- Power source for each location (PoE run, solar, or standard electrical).
- Backhaul route and technology (Ethernet, fiber, or wireless bridge) for each camera or camera cluster.
- Storage plan: local NVR capacity, cloud backup, and retention window in days.
Once the system is installed, confirm it actually meets spec with these acceptance tests:
- Photograph each camera’s actual field of view and compare against the planned coverage map.
- Verify plate and face capture at the measured distances specified in the design, not just “it looks fine.”
- Trigger each sensor and confirm the camera pop-up or PTZ slew happens within a few seconds.
- Pull recorded footage from several days back to confirm retention is actually working as specified.
When you’re ready to spec hardware for each location, think in categories rather than specific models: an identification-grade camera for the front door and gate, a context camera for open areas, thermal where darkness or foliage blocks visible light, and a PTZ for any location that needs to cover multiple angles from one post. Our buyer’s guide to security camera systems breaks down these hardware classes in more depth if you want to get specific before the installer visit.
Why Verification Beats Coverage on Every Estate We’ve Reviewed
The mistake we see most often on estate properties isn’t too few cameras. It’s too many cameras pointed at the wrong things, with no clear path from an alert to a human decision. Property owners install a dozen wide-angle cameras across open fields, get flooded with false motion alerts from wind and wildlife, and within a few months nobody’s actually watching the feeds anymore. Meanwhile the one spot that mattered, the gate, the choke point, the front door, has a camera too far away to identify anyone.
A verification-first approach flips that. Fewer cameras, better placed, tied into sensors that actually trigger something useful, beats a wall of monitors nobody checks. Law enforcement backs this up in practice: confirmed alarms get faster, more proportionate responses than unverified ones, because a dispatcher or officer knows what they’re actually walking into. That’s the entire argument for building a sensor-to-camera-to-human chain instead of just buying cameras and hoping.
Safes and Security Direct works with property owners and installers to match hardware to this kind of design, whether that means sourcing a thermal camera for a dark tree line or a solar unit for a gate with no power nearby. Getting the specification right before you buy anything saves far more money than any discount on the hardware itself.
How Safes and Security Direct Helps You Build This System
Safes and Security Direct gets you the exact hardware classes this guide recommends, identification cameras, PTZ units, thermal sensors, and solar/cellular models for off-grid locations, without forcing you through a generic bundle that doesn’t match your property’s layout.

That matters because estate perimeters rarely fit a one-size package. A gate a quarter mile from the house needs different hardware than a courtyard camera near the main entrance, and buying the wrong equipment for either spot means paying twice. Safes and Security Direct’s product catalog lets you select cameras by resolution, lens type, and power option so the site survey checklist from this guide translates directly into a hardware list, rather than getting rounded off to whatever a pre-built kit happens to include.
If you’ve already walked your property and marked your choke points, the next step is straightforward: browse the full camera system lineup and match each location on your map to the hardware class it actually needs, then request a quote for the full system before committing to an installer.
Sources
- Perimeter CCTV in India (2026): Watching the Boundary and Verifying the Alarm — Studio Matrx
- Security Camera Placement Guide 2026: Where to Mount for Best Coverage — PVRBlog
Confirm manufacturer datasheets for exact IP and IK ratings before purchasing, and consult local counsel on jurisdiction-specific privacy and audio-recording rules before finalizing camera placement near neighboring properties.
This article is general information, not a substitute for advice from a qualified lawyer. Consult a qualified legal professional about your own circumstances before acting on anything here.