

Safe Placement Workflow: Best Practices for 2026
TL;DR:
- A safe placement workflow involves carefully selecting the location, preparing the site, installing the safe, and verifying its security. Proper placement depends on threat assessment, environmental conditions, and easy access for authorized users. Ongoing maintenance and documentation are essential to preserve safety and comply with industry standards.
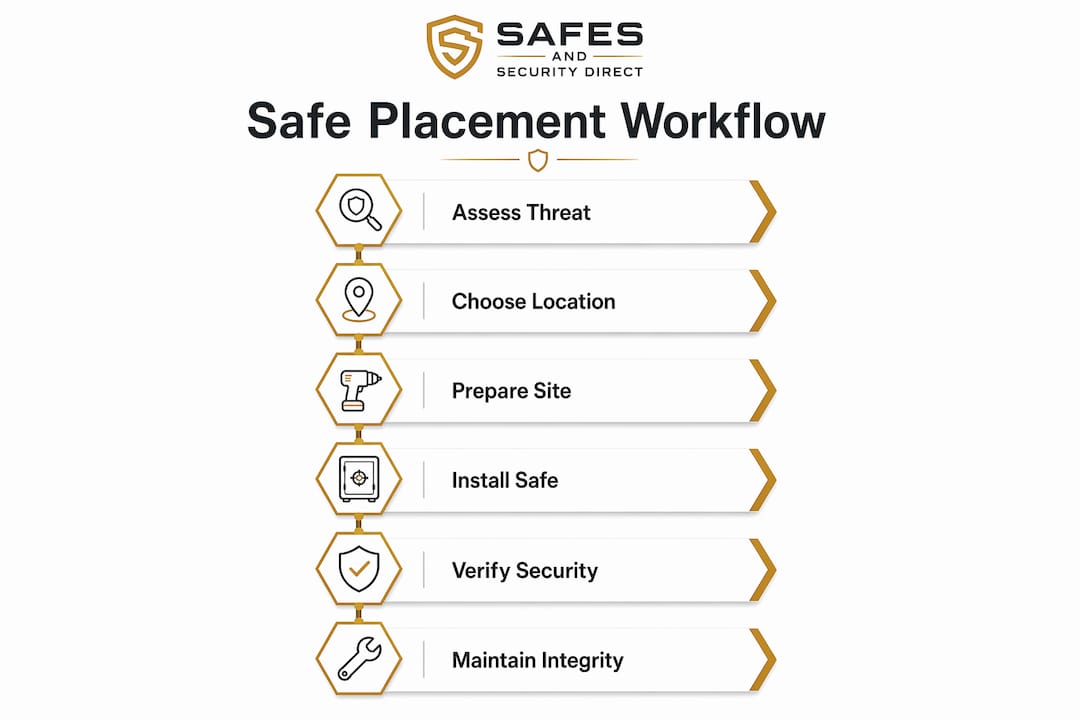
A safe placement workflow is a structured series of steps that ensures your safe is installed securely, accessibly, and in compliance with industry standards like PAS 13 and NFPA guidelines. Most theft and fire losses tied to safes trace back not to the safe itself but to poor placement decisions made before the door ever closes. The secure placement process covers four phases: location selection, site preparation, installation execution, and post-installation verification. Each phase builds on the last, and skipping any one of them creates a gap that intruders or environmental hazards can exploit.
What factors determine the optimal location for safe placement?
Location is the single most consequential decision in any safe placement workflow. A safe in the wrong spot is easier to find, easier to attack, and more vulnerable to environmental damage than one placed with deliberate care.
Threat-zone assessment
Effective safe placement demands a “threat-zone” assessment that prioritizes low visibility and structural integrity over convenience. This means avoiding the master bedroom closet, which is the first place most intruders search, and steering clear of exterior-facing walls where forced entry is easier. Interior walls on a ground floor or basement level, anchored to a concrete slab or reinforced floor joist, offer the strongest combination of concealment and structural support.
Environmental factors
Environmental conditions affect fire-resistant safes more than most owners realize. Placing a fire-resistant safe near moisture sources or exterior-facing walls in extreme climates risks insulation degradation from condensation over time. High humidity accelerates corrosion on locking mechanisms and weakens the fire-resistant lining that protects documents and media. Choose a location with stable temperature, low humidity, and adequate airflow.
Emergency egress and access balance
NFPA recommends that protective enclosures like safes be placed at least 10 feet from doors or exits to maintain clear emergency egress. That standard exists because a safe positioned near an exit creates a physical obstacle during evacuation. At the same time, the safe must remain accessible to authorized users without requiring a flashlight or a map. The best locations balance concealment from intruders with practical daily access for the people who need it.
Pro Tip: Mark your top three candidate locations on a floor plan before committing. Then walk each one at night with the lights off. If you can find it easily, so can an intruder.
What tools and prerequisites are needed before installing a safe?
Site preparation separates professional-grade installations from ones that fail under pressure. Skipping this phase is the most common reason a safe ends up poorly anchored or misaligned.
Home vs. business installation prerequisites
The requirements differ meaningfully between residential and commercial settings.
| Prerequisite | Home installation | Business installation |
|---|---|---|
| Floor reinforcement | Plywood subfloor or concrete slab | Reinforced concrete with load rating |
| Mounting hardware | Manufacturer-supplied anchor bolts | Heavy-duty anchors, steel plates |
| Pre-drilled points | Optional but recommended | Required for compliance |
| Documentation | Personal record | Audit-ready installation log |
| Professional assessment | Recommended for heavy safes | Required for high-value assets |
Pre-prepared anchoring points with reinforced concrete or dedicated mountings greatly increase difficulty for intruders and eliminate the weak points that retrofit anchors create. Retrofit anchors drilled into standard drywall or thin wood flooring can be pried out with basic tools in under two minutes.
Required equipment checklist
Gather these before the safe arrives on site:
- Hammer drill with masonry and wood bits
- Torpedo level and a 4-foot level
- Manufacturer-specified anchor bolts and washers
- Stud finder and concrete depth gauge
- Torque wrench calibrated to manufacturer specs
- Measuring tape and chalk line for alignment marking
- Personal protective equipment including safety glasses and gloves
Documenting measurable role demands and workflow decisions creates audit-ready placement records that improve consistency across teams and protect businesses during insurance or compliance reviews.
Pro Tip: Photograph the installation site before drilling. That image becomes part of your documentation record and proves the mounting surface met structural requirements at the time of installation.
How do you execute a step-by-step safe installation workflow?
A disciplined installation sequence prevents the errors that compromise security after the fact. Follow these steps in order without improvising.
-
Verify the site one final time. Confirm the floor or wall can bear the safe’s loaded weight. Check for hidden plumbing, electrical conduit, or HVAC ducts using a stud finder and a wiring detector before drilling anything.
-
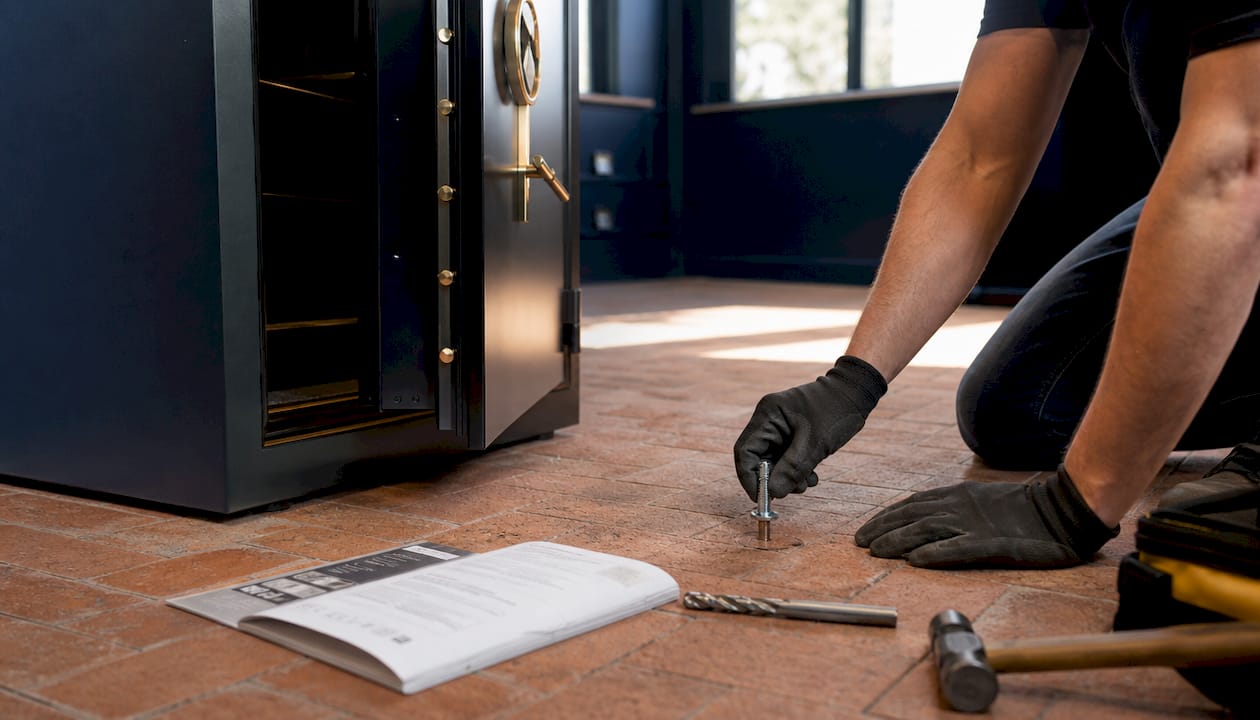
Mark the anchor points. Position the safe in its final location and use a chalk line or pencil to mark each anchor hole through the pre-drilled mounting holes in the safe’s floor or back panel. Remove the safe and double-check alignment with a level.
-
Drill anchor holes to the correct depth. Use the manufacturer’s specified bit size and drill to the exact depth required for the anchor type. Drilling too shallow leaves the anchor loose. Drilling too deep into a concrete slab can hit rebar and compromise the anchor’s grip.
-
Install anchors and set the safe. Insert anchors into the drilled holes, position the safe over them, and hand-tighten the bolts. Do not use power tools to final-torque at this stage.
-
Level and align. Place a torpedo level on the safe’s top surface and check front-to-back and side-to-side. Shim the base if needed before final tightening. A safe that is not level stresses the door hinges and can cause the locking bolts to bind over time.
-
Final torque to spec. Use a calibrated torque wrench to tighten each anchor bolt to the manufacturer’s specified torque value. Over-tightening cracks concrete; under-tightening leaves the safe mobile.
-
Structural stability test. Apply firm lateral pressure to all four sides of the safe. There should be zero movement. Any shift means an anchor is not seated correctly.
-
Verify door operation. Open and close the door through three full lock and unlock cycles. The locking bolts should engage and retract smoothly without resistance.
Automated verification steps in workflow design reduce dangerous shortcuts and decision-making under pressure, increasing consistency in safe installation. Building a written checklist for each step above turns a skilled task into a repeatable process that any trained person can execute correctly.
The most common error in safety workflow checks is placing human verification too early in the sequence, which increases fatigue risk and causes critical errors to go unnoticed. Run your final verification check after all physical work is complete, not during it.
Pro Tip: Use a home security setup workflow as a companion checklist alongside your safe installation steps. The two processes share site assessment and documentation requirements that save time when done together.
For businesses, PAS 13 guidance dictates that protective barriers must be placed at least 300mm from structural uprights to provide a buffer zone that absorbs impacts without harming the structure. Apply the same logic to safe placement near shelving, racking, or interior walls in commercial environments.
How do you maintain security integrity after safe placement?
Installation is not the end of the workflow for safe placements. Placement integrity degrades over time without a maintenance schedule.
Routine inspections should focus on mounting hardware integrity and environmental damage to preserve both security and fire-resistance ratings. Schedule these checks at least twice per year, or after any event that could stress the structure, such as flooding, seismic activity, or a building renovation nearby.
Key inspection points include:
- Anchor bolt torque: Retorque bolts to manufacturer spec. Vibration and thermal expansion loosen anchors over time.
- Moisture and condensation: Check the interior and exterior for rust, water stains, or condensation marks. Any moisture inside the safe signals a placement or sealing problem.
- Door alignment: A door that binds or requires extra force to close indicates the safe has shifted or the floor has settled.
- Fire-resistant lining: Inspect the interior lining for cracks, crumbling, or compression. Damaged lining reduces the fire rating below the certified level.
- Surrounding environment: Check for new moisture sources, HVAC changes, or structural modifications nearby that could affect the safe’s location suitability.
When a new security threat emerges, such as a break-in attempt in your area or a change in the building’s access control, reassess the placement against your original threat-zone criteria. Integrating your safe with a broader security system, including motion sensors and surveillance cameras, adds a monitoring layer that compensates for any placement limitations. Reviewing home security best practices annually keeps your placement decisions current with evolving risks.
Workflow design that sequences tasks and reduces improvisation during peak demands increases placement security and compliance over the long term. Apply that same discipline to your maintenance schedule by setting calendar reminders rather than relying on memory.
Key Takeaways
A disciplined safe placement workflow, grounded in threat-zone assessment, structural preparation, sequenced installation, and scheduled maintenance, is the most reliable way to protect valuables from both theft and environmental damage.
| Point | Details |
|---|---|
| Location drives security | Choose interior, low-traffic areas with reinforced floors and stable humidity over convenient spots. |
| Preparation prevents failure | Gather all tools, reinforce anchor points, and document the site before the safe arrives. |
| Sequence matters | Follow installation steps in order and run final verification only after all physical work is complete. |
| Maintenance preserves integrity | Inspect anchor torque, moisture, and door alignment at least twice per year to maintain fire and theft ratings. |
| Documentation protects you | Audit-ready installation records support insurance claims and compliance reviews for both homes and businesses. |
The case for treating placement as a workflow, not a one-time task
At Safes and Security Solutions, we have seen the same mistake repeat itself across hundreds of installations. Someone buys a quality safe, carries it to the most convenient spot, bolts it down loosely, and considers the job done. Six months later, the anchor bolts are finger-loose, the door binds, and the safe has shifted enough that a determined intruder could rock it free from the floor.
The uncomfortable truth is that most safe failures are placement failures, not product failures. A fire-resistant safe placed against an exterior wall in a humid climate loses its rated protection long before any fire occurs. A burglary-resistant safe anchored into a thin plywood subfloor offers resistance measured in seconds, not minutes.
What actually works is treating placement as a repeatable, documented workflow rather than a one-time physical task. Businesses that use equipment automation for verification steps in their service operations see fewer installation errors and more consistent outcomes. The same principle applies directly to safe placement. A written checklist, a torque spec, a twice-yearly inspection calendar: these are not bureaucratic overhead. They are the difference between a safe that performs as rated and one that fails when it matters most.
Pre-planning also removes the pressure-driven shortcuts that cause most errors. When you know exactly where the safe goes, what tools you need, and what the anchor torque spec is before the safe arrives, you make better decisions. Placement decisions anchored to measurable, documented criteria yield safer, auditable installations for both individuals and businesses.
— Safes and Security Solutions
Safes and Security Solutions: find the right safe for your space
Choosing the right safe is only half the equation. Knowing where and how to install it correctly is what makes the investment worthwhile.
Safes and Security Solutions carries a full range of fire-resistant, burglary-resistant, and wall safes suited for homes and commercial premises. Every product listing includes weight, anchor point specifications, and fire-rating details so you can match the safe to your site before you buy. Whether you need a compact home safe or a heavy-duty commercial unit, the full safe catalog gives you the specifications to plan your installation correctly from the start. For businesses managing multiple locations, the guidance on securing commercial premises pairs directly with the workflow steps covered here.
FAQ
What is a safe placement workflow?
A safe placement workflow is a structured sequence of steps covering location selection, site preparation, installation, and post-installation verification. Following the sequence reduces installation errors and supports compliance with standards like PAS 13 and NFPA guidelines.
Where should you never place a safe at home?
Avoid the master bedroom closet and exterior-facing walls. The master bedroom closet is the first location intruders search, and exterior walls in humid or extreme climates accelerate fire-resistant lining degradation.
How often should you inspect a safe after installation?
Inspect mounting hardware, door alignment, and interior moisture at least twice per year. Also inspect after any structural event nearby, such as flooding, seismic activity, or a building renovation.
Do you need professional installation for a home safe?
Professional installation is recommended for heavy safes and required for high-value commercial assets. Pre-prepared anchoring points with reinforced concrete greatly increase difficulty for intruders compared to retrofit anchors in standard flooring.
What documentation should you keep after installing a safe?
Keep a photographic record of the installation site, the anchor torque values used, the safe’s serial number, and the date of installation. Documenting these details creates audit-ready records that support insurance claims and compliance reviews.