

Range Customer Area Security Setup: A Complete Guide
An effective range customer area security setup runs on a single, unified platform: a cloud-capable VMS tied to zoned access control, PoE cameras covering every lane and entry point, two-way audio at check-in and lane stations, and UPS-backed secondary power on every critical circuit. That architecture is the baseline. Everything else in this guide is about specifying it correctly, testing it before sign-off, and handing it to an integrator with zero ambiguity.
Must-have elements for your integrator scope-of-work:
- Unified VMS with role-based user management, motion-triggered recording, and cloud or hybrid storage
- Zoned access control: separate credential groups for public customer areas, controlled lanes, staff rooms, and armory/equipment storage
- PoE IP cameras (overview, lane ID, and low-light models) with N+1 NVR storage
- Two-way audio at customer check-in, lane officer stations, and rear service doors
- UPS-backed secondary power on access panels, NVR, and PoE switches, sized to provide at least 4 hours of backup for access control under quiescent load, as specified in NFPA 731.
- Perimeter sensors, motion-activated lighting, and a single controlled entry point for visitor screening
- Segmented VLANs for cameras, access control, and management traffic
Immediate next-step checklist before you brief an integrator:
- Walk the site during business hours and again after closing to capture lighting conditions, blind spots, and staff movement patterns.
- Verify available power circuits and network drops at every planned device location.
- Confirm operating hours and lock/unlock schedules for each zone.
- Establish a single naming convention for all zones, credential groups, and camera labels before the first bid goes out.
Table of Contents
- What components make up a customer-area range security system?
- How do you set up access control for customer entrances and lane doors?
- Video surveillance and in-lane monitoring: what specs actually matter
- How should you harden the perimeter and entry points of a range?
- What network design keeps your security systems protected?
- Power resilience: how do you size UPS and meet NFPA requirements?
- How do you integrate VMS, access control, and monitoring into one system?
- What operational policies must you set before system go-live?
- Installation, commissioning, and final acceptance checklist
- Recommended hardware configurations for range deployments
- Key Takeaways
- Safes and Security Solutions has the hardware your integrator needs
- Useful sources and standards
What components make up a customer-area range security system?
A range security system is not a single product. It is a stack of coordinated layers, and every layer needs a line item in the procurement scope.
System layers and their operational roles:
| Component Type | Typical Placement | Role in Incident Response |
|---|---|---|
| Perimeter cameras | Parking lot, exterior walls, service gates | Early detection, license plate capture |
| Motion detectors / sensors | Exterior perimeter, after-hours zones | Intrusion alarm trigger |
| Entry screening station | Single customer intake point | Visitor ID verification, bag check |
| Access control panel + readers | Lane doors, staff rooms, armory | Credential enforcement, audit trail |
| Electrified door hardware | All controlled doors | Physical barrier, fail-safe/fail-secure behavior |
| PoE IP cameras | Lanes, lobby, range floor, exits | Evidence capture, real-time monitoring |
| NVR / cloud VMS | Server room or cloud | Retention, remote viewing, role-based access |
| Two-way audio / intercom | Check-in, lane stations, service doors | Safety announcements, remote instruction |
| Intrusion alarm panel | Central location | Alert aggregation, monitoring center dispatch |
| UPS / secondary power | Panel room, NVR rack, PoE switches | Continuity during outages |
| Management software | Admin workstation / cloud portal | Unified event view, reporting, user management |
Each layer maps to a specific operational goal. Access control creates the audit trail that tells you who was in which lane at what time. Cameras provide the visual evidence that audit trail points to. Audio closes the gap between seeing an incident and responding to it. Power resilience keeps all three running when the grid goes down.
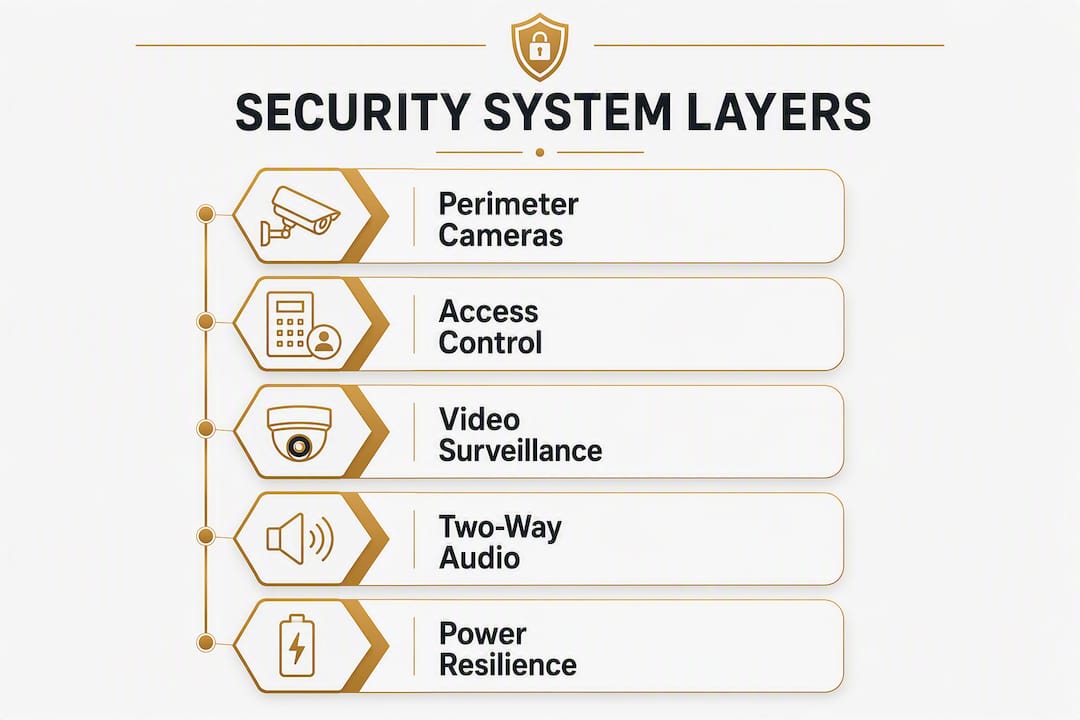
Standardizing hardware categories and naming conventions across the facility simplifies audits and remote monitoring considerably, especially if your organization manages multiple sites. Decide on device naming before the first bid, and require every integrator to follow it.
How do you set up access control for customer entrances and lane doors?
Credential types and visitor workflows
Card-based credentials (HID or similar 125 kHz or 13.56 MHz smart cards) work well for staff and regular members. Mobile credentials via Bluetooth or NFC are faster for high-throughput customer check-in and eliminate card stock management. PIN-only entry is acceptable for low-risk staff areas but should not be the sole factor on lane doors or armory access. Biometric readers add a meaningful layer for armory or high-value equipment rooms where accountability is critical.

For transient customers, the cleanest workflow is a timed credential issued at check-in and automatically expired at the end of the session. The access panel logs the entry; the VMS links the camera event to the same timestamp. That pairing is what makes evidence retrieval fast.
Zone structure for a range
Divide the facility into at minimum four credential zones:
- Public customer area: lobby, retail counter, restrooms. No credential required for entry; camera coverage only.
- Controlled lanes: requires valid session credential. Door held-open alerts active.
- Staff-only areas: break room, office, control booth. Staff card or mobile credential only.
- Armory / equipment storage: dual-factor (card + PIN or biometric). Access logged and reviewed weekly.
Door hardware specifications
Electrified strikes are the standard choice for lane doors: they are fail-safe (door releases on power loss, supporting emergency egress) and compatible with most panic hardware. Maglocks are appropriate for interior staff doors where fail-secure behavior is acceptable, but they require a request-to-exit (REX) device and must comply with local fire codes. Motorized deadbolts work well on armory doors where a visible, positive lock confirmation matters.
For every controlled door, require the integrator to document: wiring diagram, fail-safe or fail-secure behavior, door held-open alert threshold (typically 30 seconds), and the credential group assigned.
Procurement checklist for access control documentation:
- Wiring diagrams for each door controller and reader
- Fail-safe/fail-secure designation per door with fire-code justification
- Door held-open alert thresholds and escalation path
- User group naming convention and schedule matrix
- Emergency egress plan reviewed by the Authority Having Jurisdiction (AHJ)
Pro Tip: Write a one-page egress summary that lists every controlled door, its fail behavior, and the fire-code reference that justifies it. Hand it to the AHJ before installation begins. Catching a compliance issue on paper costs nothing; catching it after the hardware is mounted costs days.
For a detailed access control setup workflow, including door-hardware selection and reader placement, a locksmith/integrator walkthrough is a useful reference when drafting your procurement requirements.
Video surveillance and in-lane monitoring: what specs actually matter
Camera classes and placement
Four camera classes cover a range facility:
- Wide-angle overview cameras — (2–4 MP, 90–120° FOV): lobby, range floor, parking lot. These give you situational awareness and crowd density at a glance.
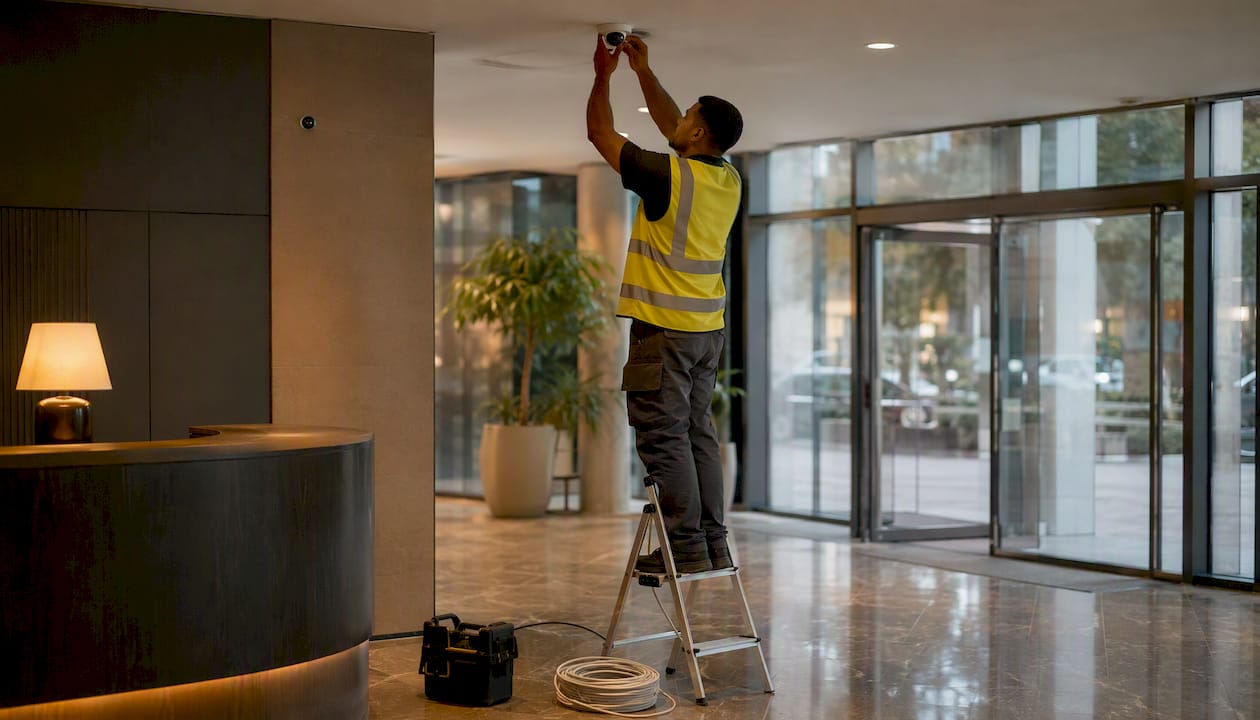
Mount indoor ID cameras at a height that balances facial detail capture and vandalism protection, typically just above average head height, angled slightly downward. Too high and you lose facial detail; too low and the camera is a vandalism target. For lane cameras, a side-angle mount at the lane divider gives you a clear view of the shooter’s position without pointing directly downrange.
After final installation, physically stand at every camera’s field of view to verify the actual image matches the planned field of view. Expect slight adjustments for signage, fixtures, or seasonal foliage that design software may miss.
That step is not optional. Design software works from floor plans; real facilities have ceiling fixtures, signage, and structural columns that shift the effective field of view by 10–20 degrees. Build physical verification into the commissioning contract as a line item.
For a deeper look at strategic camera placement and VMS configuration, the principles apply directly to range deployments.
Analytics and retention settings
Request these VMS features in every bid:
- Motion-based recording (reduces storage consumption significantly versus continuous recording)
- Tamper detection alerts (camera blocked or repositioned)
- People-counting in the lobby and customer area
- Evidence export in a non-proprietary format (MP4 or AVI with timestamp overlay)
Set retention by zone, with longer durations for sensitive areas and shorter for general surveillance, tailored to operational needs. Factor in resolution when sizing storage — a 4K camera at continuous recording consumes roughly four times the storage of a 1080p camera at the same frame rate. Motion-triggered recording at 1080p is the practical default for most lane cameras.
Two-way audio and intercom: where to use it and how to integrate it
Two-way audio earns its cost in three locations: the customer check-in counter, lane officer stations, and rear service doors. At check-in, it lets a single staff member manage the lobby remotely during peak hours. At lane stations, it replaces the need for staff to walk the floor for every safety announcement. At service doors, it screens deliveries without unlocking the door.
VoIP intercoms integrate cleanly with most modern VMS platforms and allow audio events to appear on the same timeline as camera footage. That timeline alignment is what makes incident review efficient. Analog intercoms are cheaper but require a separate recording path, which creates gaps in the evidence record.
Integration notes for the integrator scope:
- Specify SIP-compatible VoIP intercoms that register to the same network as the VMS
- Require audio events to be timestamped and stored alongside the corresponding video clip
- Document the recording policy: which stations record continuously, which record on activation
- Test intercom latency during commissioning — anything above 300 milliseconds makes two-way communication awkward
Pro Tip: Check your state’s two-party consent laws before recording audio in customer-facing areas. Post clear signage at every audio-enabled station. Include the recording policy and signage requirement in the commissioning checklist so it cannot be skipped.
How should you harden the perimeter and entry points of a range?
A range has one significant advantage over most commercial facilities: customers expect a controlled entry. Use it. A single, staffed intake point with camera coverage and a visitor credential workflow is far more effective than multiple entry points with inconsistent monitoring.
Perimeter and entry hardening checklist:
- Install perimeter cameras at all parking lot corners and service gate approaches, covering license plate capture zones
- Add motion-activated lighting at all exterior doors, service areas, and parking lot perimeter
- Place a high-resolution ID camera at the single customer entry point, angled to capture face and any carried items
- Use a queuing-area overview camera to monitor wait lines and detect pre-entry incidents
- Issue timed visitor credentials at check-in; require return or automatic expiration at session end
- Post visible signage: “Premises under 24-hour video surveillance” at all entry points
- Lock service and delivery gates with keypad or card access; log all entries
- Establish a written response protocol for perimeter alarm events before go-live
For broader guidance on securing commercial premises and visitor flow management, the same hardening principles apply at range scale.
What network design keeps your security systems protected?
Physical security systems are network-connected devices, and they are frequently the least-hardened devices on a facility network. A flat network where cameras share a subnet with office computers is a liability. Segmentation is the fix.
Step-by-step network configuration checklist:
- Create separate VLANs for: IP cameras, access control panels, intercoms, and management/admin traffic. Never put cameras and access panels on the same VLAN as general office or POS systems.
- Assign static IP addresses to all security devices. Document the IP map in the as-built package.
- Configure firewall rules to block all inbound traffic to camera and access VLANs except from the VMS server and admin workstation. Outbound cloud VMS traffic should route through a dedicated firewall rule, not open internet access.
- Use certificate-based device onboarding where the VMS supports it. Change all default device credentials before installation.
- Enable role-based access in both the VMS and access management console: operators see live view and can export clips; administrators manage users and system settings; read-only roles for monitoring staff.
- Configure NTP time sync on all devices to a single authoritative time source. Timestamp discrepancies between cameras and access panels make incident reconstruction unreliable.
- For remote viewing, use a VPN tunnel or the VMS vendor’s encrypted cloud relay. Never expose NVR or access panel management ports directly to the internet.
- Set a firmware patch cadence: review vendor advisories monthly, schedule updates during off-hours maintenance windows, and log every change.
- Enable SNMP monitoring on managed switches to alert on port failures or unexpected device disconnections.
- Document VLAN IDs, DHCP/static IP policy, firewall rules, and admin credentials in a secured, access-controlled document delivered with the as-built package.
Power resilience: how do you size UPS and meet NFPA requirements?
Secondary power is not optional for a range security system. NFPA 731 establishes requirements for premises security systems including access control and video surveillance, and specifies a 4-hour backup capacity baseline for access control systems under quiescent load. PoE power sourcing equipment (PSE) must have a secondary power source listed for the purpose and installed per NFPA 70.
The critical point NFPA 731 makes clear: there is no single universal backup duration. Designers must calculate requirements based on actual load, infrastructure, and facility criticality. A 4-hour baseline for access control is a floor, not a ceiling.
UPS sizing checklist:
| Load Category | Typical Draw | Notes |
|---|---|---|
| Access control panels | 5–10W per panel | Include door strike/lock power |
| PoE IP cameras | 7–10W per camera | Use nameplate PoE class |
| PoE switches | 15–25W base + PoE load | Size for full port utilization |
| NVR / server | 50–100W | Confirm with vendor spec sheet |
| Intercom stations | 5–10W per station | VoIP intercoms vary |
| Alarm panel | 5–20W | Include siren/strobe load |
Steps to size correctly:
- List every critical load with its nameplate wattage.
- Sum the total load in watts.
- Multiply by your target autonomy in hours (minimum 4 hours for access control per NFPA 731; 8 hours recommended for NVR and cameras at a staffed range).
- Divide by battery efficiency (typically 0.85 for sealed lead-acid) to get required battery capacity in watt-hours.
- Select a UPS rated at 125% of that figure to allow for battery aging.
For N+1 NVR storage, configure RAID on the local NVR and enable cloud backup or a secondary recording path so a single drive failure does not create a retention gap. Dual-path network connectivity (primary fiber or cable plus a cellular backup router) keeps the monitoring center connected when the primary ISP fails.
Pro Tip: Label every UPS battery with the manufacture date and installation date at the time of commissioning. Most sealed lead-acid batteries in security UPS units need replacement every 3–5 years regardless of cycle count. Build a battery replacement line into your annual maintenance budget and add a test date to the commissioning checklist.
For more on battery-powered alarm system considerations and backup power selection, the guidance applies directly to UPS-backed range deployments.
How do you integrate VMS, access control, and monitoring into one system?
Platform models and trade-offs
Three deployment models are common:
- Cloud VMS with local access panels: the VMS lives in the cloud; access control panels are on-site with local failover. Best for facilities that want remote viewing and minimal server maintenance. Retention is controlled by subscription tier, so confirm the retention window before signing.
- On-site NVR with remote viewing: full local control of retention and storage. Remote access via VPN or vendor relay. Higher upfront cost; requires local IT maintenance.
- Hybrid: local NVR for primary retention, cloud backup for redundancy, and a remote monitoring center or SOC for after-hours response. This model fits busy public facilities well because it pairs the reliability of local hardware with professional oversight.
A hybrid model pairing local hardware with professional remote monitoring often fits a staffed range better than either extreme. The local NVR handles retention and evidence export; the monitoring center handles after-hours alarm response without requiring on-site staff overnight.
Monitoring and maintenance deliverables to require in your RFP:
- Monthly firmware review and update log
- Quarterly credential audit (active users, expired credentials, dormant accounts)
- Monthly storage health report (NVR drive status, retention compliance)
- Annual camera field-of-view verification
- SLA: device failure response within 4 business hours; critical system (access panel, NVR) response within 2 hours
- Escalation path: integrator tier 1 → manufacturer support → facility manager notification
Standardizing device categories and applying one rule set for user onboarding and offboarding reduces operational blind spots and makes audits straightforward, particularly when staff turnover is high.
What operational policies must you set before system go-live?
Hardware without policy is just expensive equipment. These are the policies to finalize before the system is handed over.
Policy and documentation checklist (numbered for sign-off tracking):
- Credential issuance and removal: who approves new credentials, maximum session duration for visitor credentials, and the procedure for immediate revocation when a staff member leaves.
- Visitor procedure: check-in steps, ID verification requirement, timed credential issuance, and what happens when a visitor overstays.
- Evidence request workflow: who can request footage, what format it is exported in, chain-of-custody documentation, and retention hold procedure for active incidents.
- Mobile access rules: which staff roles may use mobile credentials, device enrollment procedure, and what happens when a device is lost or stolen.
- Recording and privacy policy: which areas are audio-recorded, required signage, and retention limits by zone.
- Incident response flow: alert received → operator reviews live view → decision to dispatch on-site staff or escalate to law enforcement → incident logged with timestamp, camera clip reference, and resolution note.
- Documentation package: as-built wiring diagrams, IP address map, admin account inventory, firmware versions at commissioning, and a change control log for all post-commissioning modifications.
Video, access, and intrusion systems work best when they support defined response plans rather than generating isolated alerts. Every alert in the system should map to a named response action before the system goes live.
Installation, commissioning, and final acceptance checklist
Pre-installation
Walk the site during business hours and again after closing. Daytime reveals staff movement patterns and customer flow; after-hours reveals lighting gaps, vendor access points, and areas that are effectively unmonitored when the range is closed. Both walkthroughs are necessary, and skipping the after-hours visit is one of the most common sources of post-install camera repositioning.
Bench testing
Before any drilling begins, bench-test every panel, reader, camera, and motion detector. Confirm each device powers on, communicates with the management software, and responds to test inputs. Resolving a firmware incompatibility on a workbench takes minutes; resolving it after the device is mounted in a ceiling takes hours.
Commissioning acceptance checklist:
- Verify every camera’s field of view by physically standing at the scene and confirming the live image matches the design plan
- Present credentials at every controlled door: valid credential (should open), expired credential (should deny), no credential (should deny and log)
- Trigger each motion detector and confirm the event appears in the VMS timeline with correct timestamp
- Trigger each door held-open alert and confirm notification delivery to the monitoring interface
- Test power loss: disconnect primary power and confirm UPS takes over within the specified transfer time, access panels remain operational, and NVR continues recording
- Test network failover: disconnect primary ISP and confirm secondary path activates and monitoring center remains connected
- Confirm mobile push notifications deliver within 60 seconds of a triggered alarm
- Verify audio recording at each intercom station and confirm clips appear in the VMS timeline
- Confirm evidence export produces a playable, timestamped file in the specified format
- Obtain client sign-off on each item above before final payment is released
Recommended hardware configurations for range deployments
Two configurations cover the majority of range facilities. Use these as the basis for your bid solicitation.
Configuration comparison
| Specification | Operational (Essential) | Professional (High-Use) |
|---|---|---|
| Overview cameras | 4–6 × 2 MP wide-angle PoE | 6–10 × 4 MP wide-angle PoE |
| Lane ID cameras | 1 × 4 MP per 4 lanes | 1 × 8 MP per 2 lanes |
| PTZ cameras | None | 1–2 × 2 MP PTZ |
| IR/low-light cameras | 2 exterior | 4 exterior + parking |
| PoE switch | Unmanaged, 100W budget | Managed, 200W budget, VLAN-capable |
| Access controller | 4-door panel, card/PIN | 8-door panel, card/mobile/biometric |
| Reader count | 4–6 readers | 8–10 readers |
| Intercom | 2-station analog | 4-station VoIP, SIP-registered |
| NVR storage | 4 TB, 30-day retention at 1080p | 8–12 TB RAID, 60-day retention at 4 MP |
| UPS sizing | access control battery backup sized to at least 4 hours under quiescent load per NFPA 731; additional duration for NVR and cameras may be specified for professional or high-use setups | |
| Cloud backup | Optional add-on | Included, hybrid model |
| Monitoring | Self-monitored | Third-party SOC or remote monitoring |
Procurement checklist for both configurations
- Request as-built wiring diagrams and IP address map at project close
- Require firmware versions to be documented at commissioning and a patch policy to be stated in the service agreement
- Confirm warranty terms: minimum 2 years on hardware, 1 year on labor
- Ask for a certificate of compliance referencing NFPA 731 and local AHJ approval where applicable
- Require the integrator to name a project owner with signing authority for scope changes and handoff sign-off
- Confirm remote monitoring options and response SLAs in writing before contract execution
Safes and Security Solutions carries surveillance camera systems, access control equipment, and supporting hardware suited to both configurations above. The product catalog includes detailed specifications and purchase options for facility managers who need to match components to a bid scope.
Key Takeaways
A range customer area security setup requires a unified VMS, zoned access control, PoE cameras, UPS-backed secondary power, and documented commissioning tests before any system is accepted.
| Point | Details |
|---|---|
| Unified architecture first | Specify a single platform integrating VMS, access control, and alarms before soliciting bids. |
| NFPA 731 power baseline | Size UPS for at least 4 hours of access control backup under quiescent load per NFPA 731. |
| Physical FOV verification | Stand at every camera scene after installation to confirm the actual image matches the design plan. |
| Bench-test before mounting | Test every panel, reader, and camera off-site before drilling to reduce field programming issues. |
| Safes and Security Solutions | Offers surveillance systems, access control hardware, and security equipment with detailed specs for procurement-ready range configurations. |
Why the architecture choice matters more than the hardware brand
The most common mistake in range security planning is treating the system as a collection of individual products rather than an integrated platform. A facility can spend significantly on cameras and access panels and still end up with a system that cannot link a camera event to an access log entry, cannot export evidence in a usable format, or goes dark the moment the power flickers.
The architecture this guide recommends, unified VMS with zoned access control and UPS-backed PoE infrastructure, is not the most expensive option. It is the option that actually works when something goes wrong at 9 PM on a Saturday. The hardware brand matters less than whether the VMS, access panel, and intercom all speak the same protocol and whether the integrator has documented every connection.
Documented commissioning is the other piece most facilities skip. A system that was never formally tested against power-loss, network-failover, and credential-denial scenarios is a system you are hoping works, not one you know works. Require the commissioning checklist as a contract deliverable, not a courtesy.
Safes and Security Solutions has the hardware your integrator needs
When you have a bid scope ready and need to match components to specifications, Safes and Security Solutions gives you direct access to professional-grade surveillance cameras, access control equipment, and security systems with full technical specifications and purchase options — no distributor markup, no minimum order negotiation.
Whether you are building out an Operational configuration for a smaller range or specifying a Professional setup with managed PoE switching, hybrid cloud storage, and SOC monitoring, the product catalog covers the hardware classes this guide specifies. Ask for a spec sheet match when you contact the team: provide your zone count, camera count, and UPS load calculation, and the response will include component recommendations with lead times and warranty terms.
Request a quote or review the full product catalog at Safes and Security Direct and get your integrator-ready hardware list in hand before the first bid goes out.
Useful sources and standards
-
Security Systems Installation Step-by-Step Guide (NIP Group) — Covers bench-testing hardware before mounting, field programming best practices, and commissioning edge-case tests including power-loss and network-down scenarios.
-
Access Control Setup Workflow for Secure Properties (A To Z Locksmith Inc) — Practical access control installation workflow from an integrator perspective; useful for door-hardware selection, reader placement, and egress compliance documentation.
Recommended
- Strategic Security Camera Setup for Optimal Protection – Safes and Security Direct
- Asset Protection Workflow Guide for Maximum Security – Safes and Security Direct
- Security Alarm System Installation: Essential Guide – Safes and Security Direct
- Why Choose Commercial-Grade Security Systems – Safes and Security Direct