

Organizing Valuables in a Home Safe: Fast and Secure
The most effective approach to organizing valuables in a home safe is to place emergency-access items at the front, store small valuables in labeled pouches or divided trays, and add a desiccant pack to control humidity. Here is what you can do right now:
- Move passports and insurance contacts to the front of the safe
- Slip jewelry and coins into padded or divided trays
- Place documents in labeled fireproof envelopes
- Drop a silica gel pack on the bottom shelf
- Do a quick visual check that the door seals and bolts engage cleanly
One boundary worth knowing upfront: if an item is truly irreplaceable or extremely high-value, a bank safe-deposit box offers stronger physical separation than any home safe.
Table of Contents
- What organizer types actually work inside a home safe?
- How to store small valuables so you can actually find them
- How to keep documents and larger items organized and retrievable
- Why humidity control is the most overlooked part of safe organization
- Visibility upgrades that help you find things without rummaging
- Step-by-step: how to set up and maintain an organized safe
- How to match your safe’s ratings to what you plan to store
- When a home safe is enough and when a bank vault is the better choice
- Routine checks that keep your safe organized and functional
- Key Takeaways
- The part most homeowners skip
- Find the right safe and organizers at Safes and Security Solutions
- Useful sources for further reading
What organizer types actually work inside a home safe?
The right internal hardware makes the difference between a safe you can navigate in 10 seconds and one you dread opening. The good news is that most standard home safes accept off-the-shelf organizers with minimal modification.
Adjustable metal shelves are the backbone of any well-organized safe. Most mid-size and larger safes ship with at least one, but adding a second shelf doubles your usable zones. Look for powder-coated steel shelves with adjustable pin slots so you can raise or lower them as your storage needs shift.
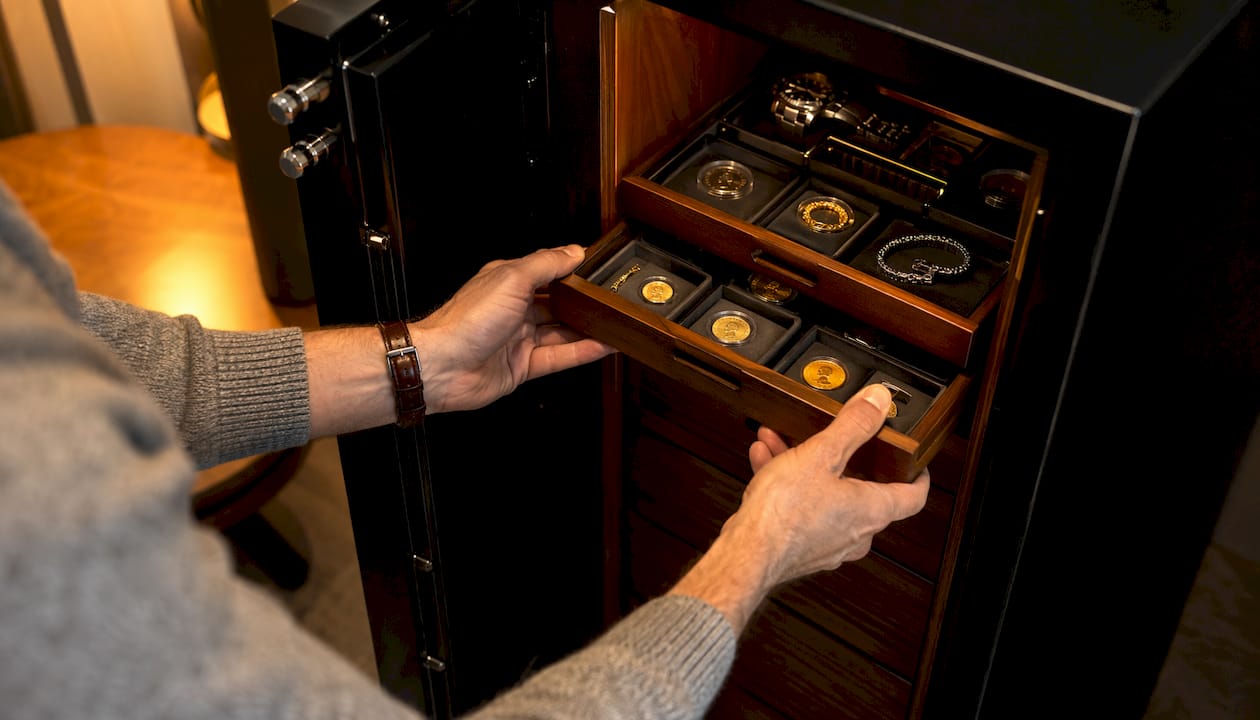
Stackable shallow drawers and removable trays handle the small-item problem better than anything else. A shallow tray keeps coins, rings, and USB drives visible at a glance instead of buried under a passport folder. Removable trays also let you lift out an entire category of items without disturbing everything else.
Door-mounted pouches and racks are the most underused real estate in a home safe. The interior door is flat, rigid, and often completely empty. A fabric or nylon door organizer with clear pockets can hold folded documents, small envelopes, or a spare key without consuming any shelf space.
Foam inserts with custom cutouts work especially well for watches, handguns, or any item with an irregular shape. Pre-cut foam kits are available at most hardware stores; you can also order custom-cut foam online if you have a specific collection to protect.
Clear modular boxes let you group items by category (coins in one, memory cards in another) while keeping everything visible through the lid. Opt for boxes with snap-close lids rather than friction-fit ones, since vibration from a closing safe door can pop loose lids open over time.
Before ordering anything, measure the interior of your safe: depth from door to back wall, interior width, and the height of each shelf zone. Most organizer listings include external dimensions, so subtract about half an inch on each side for clearance.
Pro Tip: Buy modular pieces in a consistent size family. A set of small, medium, and large boxes from the same product line stacks cleanly and leaves no wasted gaps, which matters more as your collection grows.
How to store small valuables so you can actually find them
Small items cause the most frustration inside a safe, not because they are hard to protect, but because they are easy to lose track of. A few targeted containers fix this almost entirely.
Divided jewelry trays with individual compartments prevent chains from tangling and keep rings from scratching each other. Velvet-lined trays are worth the small premium for anything with a soft stone or a polished finish. For watches, a roll-style case or a foam insert with molded wrist-sized cutouts keeps crowns and crystals from contacting hard surfaces.
Coin capsules are the right choice for any numismatic collection. Bare coins stacked in a pouch pick up micro-scratches every time the safe vibrates or the pouch shifts. Individual capsules also make it easy to pull one coin without handling the rest.
Labeled waterproof zip pouches handle memory cards, USB drives, and SIM cards better than any rigid container. They compress flat, stack easily, and the label tells you exactly which drive holds which backup. Keep data devices in their own dedicated pouch rather than mixing them with metal items.
A few rules that prevent the most common mistakes:
- Never stack loose items directly on a metal shelf. Even a soft cloth between the shelf and the item reduces scratch risk significantly.
- Keep silver away from rubber and certain plastics. Sulfur compounds in some materials accelerate tarnishing.
- Do not store liquids, cleaning solutions, or anything with a chemical smell near metals or paper. Even a sealed bottle can off-gas.
- Group items by how often you need them. Daily-access items go in the front tray; rarely touched pieces go toward the back or on an upper shelf.
Organizing a safe efficiently means treating frequency of use as the primary sorting principle, with protection requirements as a close second.
How to keep documents and larger items organized and retrievable
Documents are where most home safes turn into a mess. People stuff in loose papers, fold originals that should never be folded, and end up with a pile that takes five minutes to search in an emergency.
The fix is simple: every document category gets its own container. Labeled manila folders work for groupings like “insurance,” “property,” and “vehicle titles.” Slide those folders into a flat document box or a fireproof envelope rated for at least 30 minutes at 1,550°F, which is the standard paper-char threshold. For anything that might face water exposure, a waterproof resealable bag inside the fireproof envelope adds a second layer of protection.
Placement inside the safe follows a simple priority rule. Passports, insurance contacts, a small cash reserve, and any document you might need in the first 24 hours of an emergency go at the front, upright and easy to grab. Original birth certificates, property deeds, and rarely accessed legal documents go toward the back or in a deeper shelf zone. For guidance on which documents belong in a home safe versus a bank vault, the safe for legal documents guide from Safes and Security Solutions covers the tradeoffs clearly.
Three mistakes that are worth avoiding: overstuffing the safe so the door strains to close, folding original documents along creases that weaken the paper over time, and placing archival photos directly against bare metal surfaces. Photos need an acid-free sleeve or envelope between them and any metal shelf or tray.
Why humidity control is the most overlooked part of safe organization
A locked, bolted safe with no humidity management can still destroy paper, corrode silver, and degrade electronics. The interior of a sealed safe traps moisture, and in humid climates or during seasonal temperature swings, that moisture accumulates faster than most people expect.
Paper absorbs moisture and becomes brittle or moldy. Photos develop foxing (brown spots) within months in a humid environment. Electronics corrode at contact points. Silver and iron-bearing metals oxidize. The fix costs almost nothing and takes about two minutes to set up.
Practical humidity controls to use:
- Silica gel desiccant packs: the most common solution. Place one or two packs on the bottom shelf or in a corner. Rechargeable versions can be dried in an oven and reused for years.
- Humidity-control capsules: products like Boveda or similar two-way humidity packs actively absorb or release moisture to maintain a target relative humidity, typically around 45–50% for mixed valuables.
- Small electric safe dehumidifiers: a low-wattage rod-style dehumidifier plugged through a small hole in the safe wall works well for larger safes in consistently humid spaces.
- Waterproof resealable bags: for documents and electronics, a sealed bag inside the safe is a backup layer if the desiccant gets saturated.
Replace standard silica gel packs regularly or sooner if you notice condensation on the interior walls. Check humidity-control capsules every two months; most change color or feel noticeably heavier when saturated.
Visibility upgrades that help you find things without rummaging
The fastest way to destroy a well-organized safe is to rummage through it every time you need something. Rummaging shifts items out of place, scratches surfaces, and gradually turns a tidy system into a pile. Good visibility prevents that.
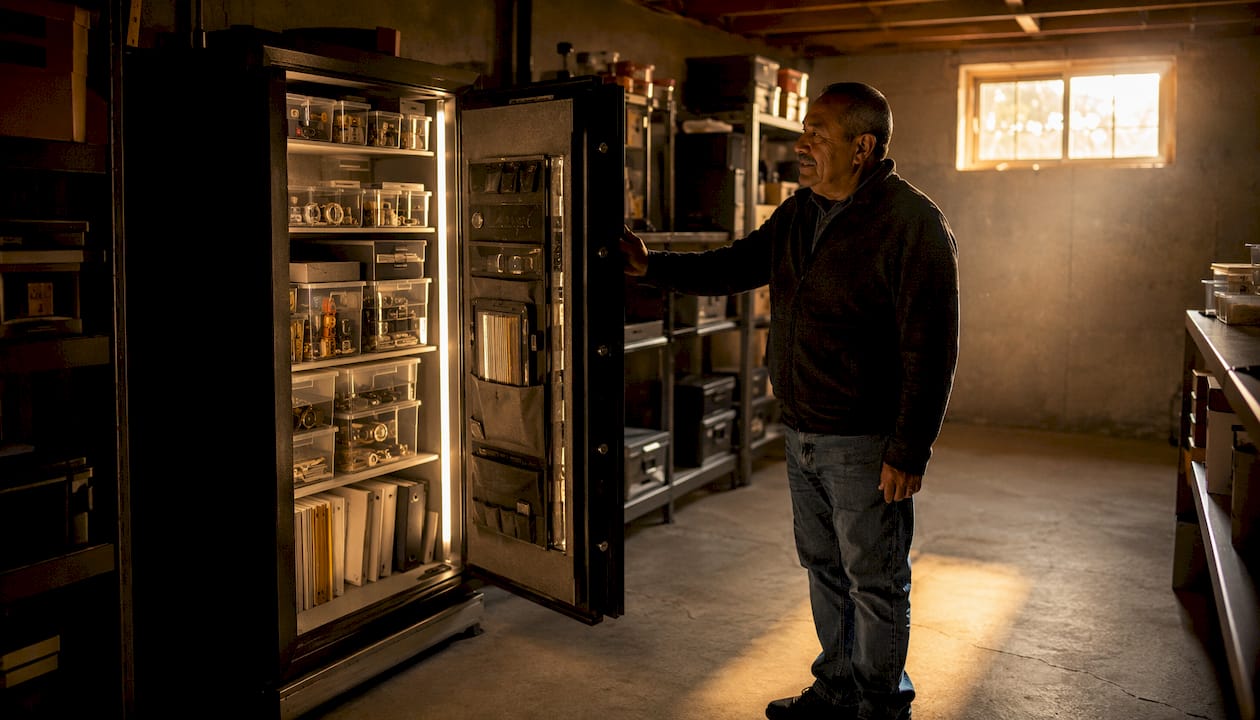
Clear plastic boxes and pouches are the single highest-return upgrade. When you can see the contents without opening a container, you stop moving things unnecessarily. Apply a small adhesive label to the front face of each box: one or two words, nothing elaborate.
A master inventory card kept inside the safe door pocket (or taped to the interior wall) lists every category stored and its location. “Jewelry: front tray. Passports: front folder. Coins: middle shelf, left box.” That card takes 10 minutes to write and saves hours over the life of the safe. Photograph every item before placing it in the safe and store those photos externally in cloud storage or with a trusted contact. This creates an evidence trail for insurance claims if the safe is ever compromised.
Clip-on LED lights designed for closets or cabinets work inside most safes. A motion-activated strip stuck to the interior ceiling turns on the moment you open the door. For a deeper safe, this is the difference between seeing the back shelf clearly and guessing.
Keep frequently accessed items in the front zone at eye level. Rarely touched originals and backup items go to the back or upper shelves. That single placement rule, consistently applied, keeps the front zone clean and the safe easy to navigate.
Step-by-step: how to set up and maintain an organized safe
Follow this sequence once, and the system largely maintains itself with quarterly check-ins.
- Empty the safe completely. Lay everything on a table so you can see what you actually have.
- Sort into categories. Emergency access, documents, jewelry/small valuables, data devices, cash. Discard anything that does not need to be there.
- Photograph every item. Note serial numbers and appraisal values. Store the photos in cloud backup or with a trusted family contact — this is a core step for insurance recovery.
- Choose and install organizers. Match shelf heights and tray sizes to your sorted categories. Install door pouches if the door is bare.
- Place items by priority. Emergency-access items at the front. Rarely used originals toward the back. Delicate items on padded trays, not bare shelves.
- Add humidity control. Place desiccant packs or a humidity capsule before closing up.
- Write the master inventory card. One line per category, one line per location. Place it inside the door pocket.
- Test the door and lock. Open and close three times. Confirm the bolt engages cleanly and the seal compresses evenly.
Quarterly maintenance: swap or recharge desiccant packs, check the door gasket for cracks, test the lock or electronic keypad, verify bolt-down hardware is tight, and update the inventory photos if anything has changed.
Do this now: Set a 20-minute timer. Pull everything out of your safe, sort it into the five categories above, put emergency items at the front, and drop in a fresh desiccant pack. That single session gets you 80% of the way to a well-organized safe.
How to match your safe’s ratings to what you plan to store
The interior organization only works if the safe itself is rated for what you are protecting. A safe that looks solid but carries no meaningful fire or burglary rating is essentially a locked box.
Fire ratings describe how long the interior stays below the paper-char temperature (typically 350°F) while the exterior is exposed to a standardized fire. A 30-minute rating at 1,550°F is the practical minimum for document storage. For digital media like USB drives and hard drives, you need a lower interior threshold (125°F or below) because electronics fail at temperatures well below paper-char. Check the fire rating specs before assuming a document safe also protects your drives.
Burglary ratings tell you how long a safe resists a tool attack. Risk-management guidance from Chubb recommends a TL-30 or TR-30 rating (tool-and-torch resistance for 30 minutes) for high-value or hard-to-replace items. Entry-level residential safes often carry no UL burglary rating at all, which is fine for basic document storage but not for jewelry or cash above a few hundred dollars. For a deeper look at burglary ratings, Safes and Security Solutions breaks down what each classification actually means in practice.
Bolt-down and placement matter as much as the rating. A heavy safe that is not anchored can be carried out. Bolt the safe to the floor or wall framing using the pre-drilled anchor points most models include. Placement also affects security: burglars target obvious locations near entry points first. A back closet, a home office, or a floor installation behind furniture is harder to find and harder to access quickly. For detailed safe placement tips, the nine-point guide from Safes and Security Solutions covers concealment and anchoring together.
Quick buyer checklist:
- Storing original documents: minimum 30-minute fire rating, UL-listed
- Storing digital media: look for a media-rated safe with interior temp below 125°F
- Storing jewelry or cash above a few hundred dollars: UL burglary rating, bolt-down required
- Daily-access items: prioritize lock type (electronic keypad for speed) over maximum fire rating
When a home safe is enough and when a bank vault is the better choice
Home safes handle the vast majority of what most households need to protect. The question of when to move something to a bank safe-deposit box comes down to two factors: how irreplaceable the item is, and how often you need to access it.
The FDIC notes that home safes are convenient for immediate access but are not a complete replacement for a bank vault. Bank safe-deposit boxes sit inside a vault with guards, cameras, and environmental controls that most home safes cannot match. The tradeoff, as Investopedia points out, is that access is limited to bank hours and the contents are not insured by FDIC deposit insurance. Banks typically do not insure the contents of a box either, so a separate insurance rider is worth considering for high-value items stored there.
| Item category | Irreplaceability | Recommended storage |
|---|---|---|
| Passports, insurance contacts | Medium (replaceable with effort) | Home safe, front zone |
| Cash reserve (small) | Low | Home safe |
| Original birth certificates, deeds | High | Bank vault or fireproof home safe |
| Jewelry (daily wear) | Medium | Home safe, padded tray |
| Heirloom jewelry, rare coins | Very high | Bank vault |
| USB drives, backup drives | Medium | Home safe, waterproof pouch |
| Irreplaceable photos, documents | Very high | Bank vault + digital cloud backup |
| Firearms | Varies | Home safe (gun-rated) |
The practical rule: keep in your home safe anything you might need within 24 hours or that you can replace with time and paperwork. Move to a bank vault anything that cannot be recreated, replicated, or insured back to full value.
Pro Tip: Use both. Keep a working set of documents and frequently accessed valuables at home, and store the true originals and highest-value items in a bank box. The combination gives you speed at home and maximum protection for what matters most. For precious metal collectors, a structured inventory approach for cataloging and appraising your holdings makes the home-safe-versus-bank-vault decision much cleaner.
Routine checks that keep your safe organized and functional
A well-organized safe drifts back toward disorder without a light maintenance routine. Quarterly is the right cadence for most households.
Quarterly inspection checklist:
- Swap or recharge desiccant packs; check for condensation on interior walls
- Inspect the door gasket or seal for cracks, compression loss, or debris
- Test the lock: electronic keypads should respond on the first press; mechanical locks should turn smoothly
- Check door alignment by opening and closing slowly; the bolt should engage without forcing
- Verify bolt-down hardware by attempting to rock the safe; no movement means the anchors are holding
- Update the master inventory if anything has been added or removed
Common problems and quick fixes:
Condensation on interior walls usually means the desiccant is saturated. Replace it and check whether the door seal is compressing fully. A worn gasket lets humid air in faster than any desiccant can absorb it.
Stuck drawers or trays are often caused by items shifting and pressing against the drawer sides. Remove the tray, reposition contents, and check that nothing is overhanging the edges.
Electronic keypad unresponsive typically means low batteries. Most electronic safes signal this with a slow beep or a red indicator before full failure. Change batteries at every quarterly check regardless of the indicator.
If the safe needs re-bolting after a floor repair or relocation, follow the manufacturer’s anchor instructions or consult a professional locksmith. Log every maintenance action in the master inventory with a date. That record matters if you ever need to make an insurance claim or sell the safe.
Key Takeaways
Organizing a home safe well means placing emergency items at the front, using labeled containers for every category, controlling humidity, and matching your safe’s ratings to what you store.
| Point | Details |
|---|---|
| Emergency items go first | Place passports, insurance contacts, and cash at the front for immediate access. |
| Use labeled containers | Divided trays, fireproof envelopes, and clear pouches prevent rummaging and damage. |
| Humidity control is non-negotiable | Add silica gel or a humidity capsule; replace every three to six months. |
| Match ratings to contents | Digital media needs a media-rated safe (below 125°F interior); jewelry needs a UL burglary rating and bolt-down. |
| Bank vault for irreplaceables | Move items that cannot be recreated or fully insured to a bank safe-deposit box. |
| Safes and Security Solutions | Browse fire-rated and burglary-rated safes with matching interior organizers at Safes and Security Solutions. |
The part most homeowners skip
Most people buy a safe, put things in it, and consider the job done. The safe is locked, so it must be protected. That assumption is where things go wrong.
What customers consistently underestimate is that a safe without internal organization is just a locked pile. When you cannot find what you need in under 30 seconds, you start leaving the door open longer, handling items more, and eventually pulling things out and not putting them back correctly. The organization breaks down, and with it, the protection.
The second thing people miss is the rating gap. A fireproof safe that protects paper at 350°F will destroy a USB drive or a hard drive at the same temperature. A safe with no burglary rating offers almost no resistance to a determined thief with basic tools. Knowing what you store and matching the safe’s specifications to those items is not optional; it is the whole point.
Safes and Security Solutions publishes detailed product specs precisely because these decisions matter. The right safe, organized correctly, with the right ratings for your contents, is a genuinely different level of protection than a generic locked box from a big-box store.
Find the right safe and organizers at Safes and Security Solutions
Knowing how to arrange your safe is only half the equation. The other half is having a safe that is actually rated for what you store, with interior dimensions that fit real organizers.
Safes and Security Solutions carries fire-rated and burglary-rated safes across every category: home, jewelry, gun, wall-mount, and in-floor models, all with published UL ratings and interior dimensions so you can plan your organization before the safe arrives. The product range includes interior accessories like shallow drawers, jewelry trays, and humidity-control packs alongside the safes themselves. For bolt-down hardware and anchoring guidance, the site’s installation resources walk through the process step by step.
Browse the full range of home safes and security products at Safes and Security Solutions and find the model that matches what you store.
Useful sources for further reading
| Source | What it covers | Why it is useful |
|---|---|---|
| FDIC: Safe Deposit Boxes and Home Safes | Tradeoffs between home safes and bank safe-deposit boxes | Authoritative federal guidance on when each option is appropriate |
| Chubb: Where to Keep Your Valuables | Risk-management guidance including TL-30/TR-30 ratings and bolt-down recommendations | Insurance-industry perspective on ratings and anchoring |
| Safesever: What to Store in a Home Safe | Practical checklist for home safe contents and external inventory | Step-by-step guidance on what belongs in a home safe versus a bank vault |
| Investopedia: Safe Deposit Box | Bank vault access limitations and insurance gaps | Explains why bank box contents are not FDIC-insured |
| AAA Club Alliance: Hiding Spots Burglars Check First | Common locations burglars target first | Supports placement and concealment decisions |
| Safes and Security Solutions: Burglary Ratings Guide | UL burglary rating classifications explained | Helps match safe rating to stored valuables |
| Safes and Security Solutions: Fire Rating Explained | Fire rating specs and interior temperature thresholds | Critical for choosing the right safe for documents versus digital media |
| Safes and Security Solutions: How to Bolt Down a Safe | Step-by-step anchoring instructions | Practical guide for securing a safe to floor or wall framing |