

Motion Sensor Placement Guide for Homeowners
Place PIR motion sensors several feet high in room corners, aimed across traffic paths, and you’ll cover most of your home with fewer false alarms than any other single approach. Before you drill a single hole, run three quick checks:
- Corner placement: Can the sensor see at least two walls and the main entry path from that spot?
- Height: Is the mounting point between 6 and 8 feet off the floor?
- Line of sight: Is the path between the sensor and the coverage zone clear of furniture, curtains, and large objects?
Pro Tip: The single most common false-alarm mistake is mounting a sensor on a wall directly across from a window. Morning sunlight or a passing car’s headlights will trigger it repeatedly. Move it to a corner perpendicular to the window instead.
Key Takeaways
Proper motion sensor placement comes down to height, angle, line of sight, and testing before you commit to a permanent mount.
| Point | Details |
|---|---|
| Mount at 6–8 feet | The 7-foot mark balances detection range, pet avoidance, and downward angle for most rooms. |
| Use corners for indoor sensors | Corner placement gives the widest field of view across entry paths and circulation routes. |
| Favor lateral capture outdoors | Side-mount sensors across driveways and walkways; head-on mounting misses approaching motion. |
| Avoid heat sources and windows | HVAC vents, heaters, and direct sunlight are the leading causes of false alarms in residential installs. |
| Safes and Security Solutions | Carries PIR sensors, dual-tech units, and full camera systems with mounting hardware at safesandsecuritydirect.com. |
Table of Contents
- How do motion sensors actually detect movement?
- Where should you place sensors indoors for the best coverage?
- Where not to place sensors — and why each spot causes problems
- What mounting height and detection angle should you use?
- How do you reduce false alarms without losing coverage?
- Installation and testing checklist
- Which sensor technology fits your specific situation?
- How should you place sensors outdoors?
- How do motion sensors integrate with alarms and cameras?
- How do you keep sensors working reliably over time?
- What most placement guides get wrong
- Security products and support from Safes and Security Solutions
- Sources
How do motion sensors actually detect movement?
A passive infrared (PIR) sensor doesn’t emit anything. It reads the difference in heat signatures as a warm body moves across its field of view. That distinction matters for placement: PIR sensors are excellent at detecting side-to-side crossing motion, but they struggle with someone walking straight toward them and can miss a person sitting still on a couch entirely.
The detection field is fan-shaped, not a spotlight. Sensitivity is strongest in the middle zone and falls off toward the edges and at longer distances. Most residential PIR sensors cover a cone roughly 90–110 degrees wide and 20–40 feet deep, though real-world performance in furnished rooms is typically shorter. Walls, furniture, and even thick curtains interrupt that cone completely because infrared doesn’t pass through solid objects.
PIR sensors are often mistaken for general-purpose presence detectors. For applications where someone needs to be detected while seated — a home office, a living room couch — a millimeter-wave (mmWave) presence sensor is the correct tool. As Texas Instruments’ application note on PIR limitations explains, PIR is optimized for motion detection, not stationary presence.
Beyond PIR, three other technologies are worth knowing:
- Microwave sensors emit radar pulses and detect motion through walls and partitions, which makes them useful in open warehouses but prone to false triggers in homes with thin walls.
- mmWave sensors use high-frequency radar to detect even subtle movement like breathing, making them the right choice for offices or rooms where occupancy detection matters more than intrusion detection.
- Dual-technology sensors combine PIR and microwave, requiring both to trigger simultaneously. That pairing cuts false alarms sharply in tricky environments, though it adds cost and setup complexity.
Pro Tip: Before drilling, tape the sensor temporarily at the planned height and walk through the room at normal speed, then slow speed, then crouching. If it misses you in any of those passes, adjust the angle before you commit.
Where should you place sensors indoors for the best coverage?
Corners are the single best indoor location because they give the sensor the widest possible field of view across a room. A sensor mounted in the corner of a living room, aimed diagonally, can cover both the main entry and the circulation path to the hallway with one device. SafeWise’s sensor placement guide recommends mounting most indoor sensors at about 6–8 feet high in corners or wherever they can watch entry and traffic paths simultaneously.
Room-by-room, here’s where sensors do the most work:
- Living rooms: Corner placement aimed at the main entry and toward the hallway. Avoid aiming directly at large windows.
- Hallways: Mount at one end, aimed down the length of the corridor. Hallways are ideal for PIR because the motion is almost always lateral to the sensor.
- Entryways and foyers: Position above the door frame or in the corner nearest the front door, angled to catch anyone stepping inside.
- Stairwells: Mount at the top of the stairs, aimed downward. This catches anyone ascending before they reach the upper floor.
- Kitchens: A corner near the entrance works well. Avoid mounting directly above the stove or refrigerator, where heat fluctuations cause false triggers.
- Basements: One sensor in the corner nearest the staircase covers most basement layouts. If there’s a separate exterior basement door, add a door/window contact sensor there as a first layer.
Layering matters. A motion sensor alone won’t tell you how someone got in. Pairing interior sensors with door and window contact sensors gives you an entry alert before the motion sensor ever fires. Add a camera at the main entry point and you have visual confirmation. For a full picture of how these devices work together, the home security setup workflow at Safes and Security Solutions walks through the full layering logic.
Where not to place sensors — and why each spot causes problems
Most false alarms and blind spots trace back to a handful of predictable mistakes. Knowing them in advance saves a lot of re-drilling.
- Near HVAC vents or baseboard heaters: Warm air rising from a vent mimics the heat signature of a moving body. A sensor mounted within a few feet of a vent will trigger every time the furnace cycles.
- Facing windows with direct sunlight: Sunlight shifts rapidly as clouds pass, and the infrared change is enough to fire a PIR sensor. Headlights at night do the same thing.
- Behind large furniture: A bookcase or armoire in the sensor’s path creates a dead zone. Anyone moving behind it is invisible.
- Directly across from a door in a tight room: In a narrow hallway or small bedroom, a sensor aimed straight at a door catches head-on motion poorly. PIR needs lateral crossing motion to work reliably.
- Unconditioned spaces (garages, attics, sunrooms): Temperature swings in these spaces are extreme. A garage that goes from 20°F to 80°F in a few hours will generate constant false triggers from the ambient heat change. Use door contacts or dedicated garage sensors instead.
- Outdoors without weatherproofing: Standard indoor PIR sensors are not rated for outdoor exposure. Wind-blown foliage, rain, and insects crawling across the lens are all common triggers.
When interior sensors are the wrong tool entirely, consider door and window contacts for perimeter entries, glass-break detectors for large window walls, and cameras with built-in motion analytics for spaces where you need visual confirmation rather than a binary alarm trigger. Avoiding common placement errors applies to cameras and sensors alike.
What mounting height and detection angle should you use?
The sweet spot for most residential PIR sensors is 6–8 feet off the floor, with 7 feet being the practical compromise most installers land on. Too low and pets, children, and low furniture enter the detection zone constantly. Too high and the sensor’s downward angle becomes so steep that it misses motion in the far half of the room.
Field testing by SmartHomeGearReviews found that a 7–8 foot mounting height with a slight downward tilt provides the best balance between detection range and false-trigger resistance. That slight downward angle keeps the sensor’s hot zone on the floor plane where people actually walk, rather than wasting sensitivity on the upper walls.
| Mounting Height | Coverage Characteristics | Pet Considerations | Notes |
|---|---|---|---|
| 4–5 feet | Wide lateral coverage, short range | High pet-trigger risk | Rarely recommended for security use |
| 6–7 feet | Good balance of range and angle | Moderate risk; use pet-immune mode | Most common residential install height |
| 7–8 feet | Longer range, steeper downward angle | Lower risk for small dogs | Preferred for open-plan rooms |
| Above 8 feet | Ceiling-level; very steep angle | Minimal pet risk | May miss slow or crouching movement |
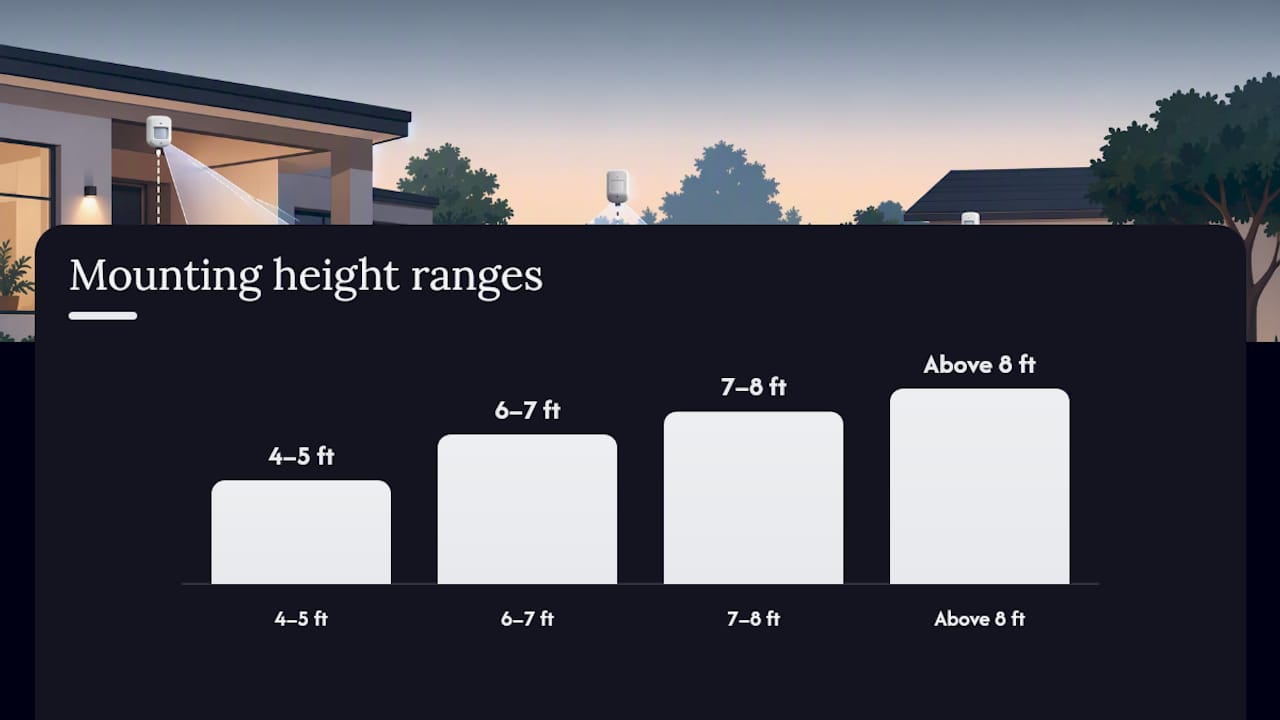
To mark your coverage zone before drilling, hold the sensor at the planned height with painter’s tape and have someone walk the room while you watch the indicator light. Mark the edges of the detection field on the floor with tape. You’ll immediately see whether the corner you chose actually covers the entry path or leaves a gap near the door.
How do you reduce false alarms without losing coverage?
Most false-trigger problems are fixed by sensitivity tuning or a small angle change, not by replacing hardware. Start there before anything else.
Sensitivity settings in your app or on the sensor itself control how large a heat differential is needed to trigger detection. Lowering sensitivity reduces pet and HVAC triggers but also makes the sensor less responsive to slow-moving people. Raise it only if you’re missing real events; lower it if you’re getting nuisance alerts from a specific direction.
Mounting angle tweaks fix the majority of remaining issues. Tilting the sensor slightly away from a window, or rotating it a few degrees away from a vent, often eliminates a persistent false trigger without moving the sensor at all. Kaizen Intelligence’s multi-sensor testing recommends setting different timeout periods by zone: shorter timeouts in hallways (where motion is brief and frequent) and longer timeouts in living rooms (where you want the sensor to stay armed longer after detecting movement).
For pet households, the options are:
- Pet-immune PIR sensors use a downward-angled lens that ignores heat signatures below a certain height, typically filtering out animals under 40–80 lbs depending on the model.
- Raise the mounting height to 7–8 feet and angle steeply downward. A cat or small dog rarely generates enough heat signature at that angle to trigger detection.
- Use alternative sensor types at floor level: door contacts on pet doors, pressure mats, or cameras with pet-filtering analytics.
Environmental fixes round out the toolkit. Trim any shrubs or tree branches that move in the wind near outdoor sensors. Block direct sunlight from reaching an indoor sensor’s lens with a small foam shield or by relocating it to a wall that doesn’t face south or west. Keep sensors at least 3 feet from any HVAC vent or return.
Pro Tip: If a sensor keeps triggering at the same time of day, check the sun’s position at that hour. A sensor that fires every morning at 8 AM is almost certainly catching direct sunlight through a window. A simple angle adjustment of 10–15 degrees usually solves it.
Installation and testing checklist
Follow this sequence and you’ll avoid the most common re-do situations.
- Gather tools: Painter’s tape, a level, a drill with appropriate anchors for your wall type, a ladder, and your phone with the sensor’s app installed.
- Temporary mount: Use painter’s tape or a command strip to hold the sensor at the planned height and position. Do not drill yet.
- Walk-test at normal speed: Walk through the detection zone at a natural pace. Confirm the indicator light fires.
- Walk-test at slow speed and crouching: Slow movement and low posture are the two most common misses. If the sensor fails either test, adjust the angle downward slightly.
- Test from the entry point: Walk in from the door the sensor is meant to cover. A sensor that misses the first two steps inside the door is poorly aimed.
- Check for false triggers: Stand near the HVAC vent, open a window, and let sunlight shift. If the sensor fires without you moving, relocate or adjust the angle.
- Adjust sensitivity: Use the app to tune sensitivity until you get reliable detection without nuisance alerts.
- Permanent mount: Once the walk-test passes cleanly, drill and mount. Use a level to keep the sensor straight.
- Final system test: Arm the full system and walk the coverage zone again. Confirm the alarm panel or app receives the trigger correctly.
Temporary mounting with painter’s tape is the single step most homeowners skip, and it’s the one that prevents the most re-drilling. SmartHomeGearReviews’ DIY guide specifically recommends this approach for verifying coverage before committing to a permanent install.
Which sensor technology fits your specific situation?
PIR is the right default for most residential security applications: it’s affordable, reliable, and well-understood. But it’s the wrong tool for several common scenarios.
| Use Case | Recommended Sensor Type | Why |
|---|---|---|
| Hallway / stairwell | PIR | Lateral crossing motion; low false-alarm risk |
| Living room with pets | Pet-immune PIR or dual-tech | Filters low heat signatures; reduces nuisance alerts |
| Home office (seated presence) | mmWave | Detects stationary occupancy; PIR misses seated people |
| Garage / workshop | Dual-tech (PIR + microwave) | Handles temperature swings; requires two triggers |
| Driveway / outdoor zone | Outdoor PIR or microwave | Weatherproof housing; lateral placement preferred |
| Open warehouse / large space | Microwave | Penetrates partitions; covers large volumes |
The TI application note on PIR sensor limitations is worth reading if you’re specifying sensors for an office or any space where occupancy detection (not just intrusion detection) matters. For home security terminology that covers these distinctions in plain language, Safes and Security Solutions’ terminology guide is a useful reference.
Dual-technology sensors require both PIR and microwave to trigger simultaneously, which cuts false alarms sharply in high-interference environments like garages and sunrooms. The tradeoff is a higher price point and slightly more complex setup. For most living spaces, a well-placed pet-immune PIR sensor handles the job without the added complexity.
How should you place sensors outdoors?
Outdoor placement follows a different logic than indoor. The goal shifts from room coverage to approach detection, and the environment introduces variables — wind, rain, wildlife, and landscaping — that don’t exist inside.
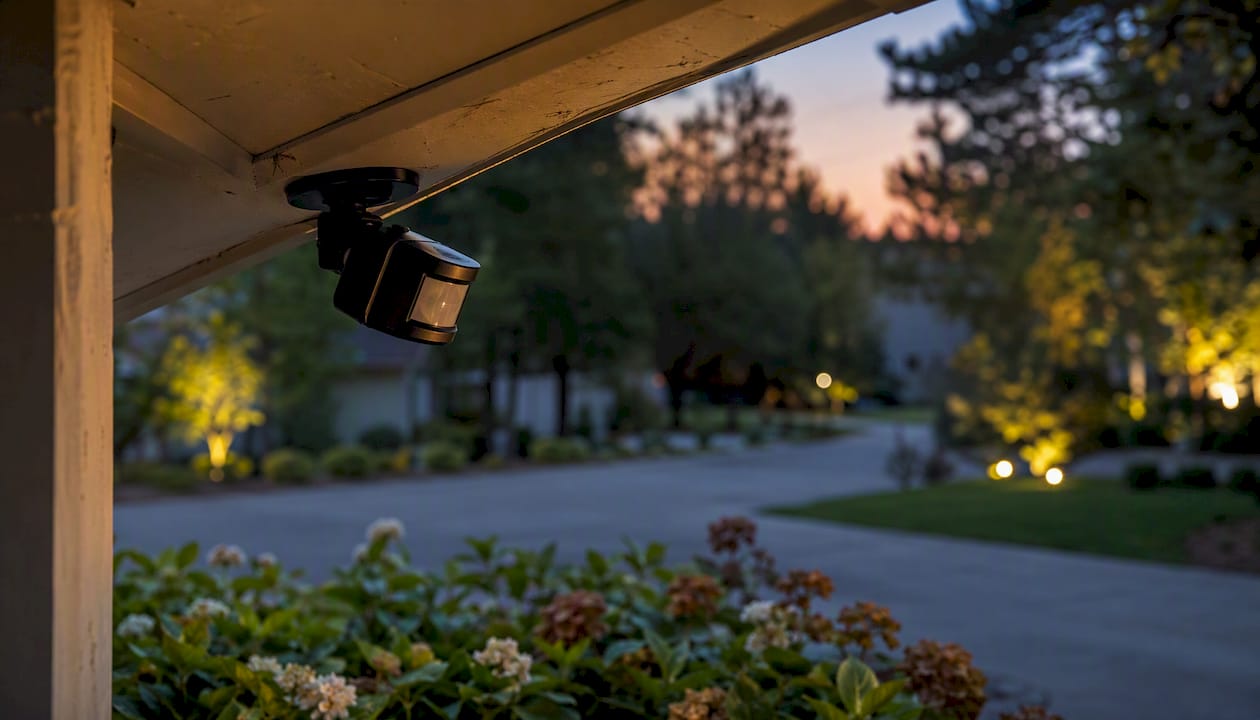
The most important rule: favor lateral capture over head-on mounting. A sensor mounted on the side of a garage, angled across the driveway, will detect a person walking up the drive far earlier than a sensor mounted at the end of the driveway aimed straight at the approaching person. PIR’s weakness with head-on motion is amplified outdoors where distances are longer.
Treat each approach path independently. The front walkway, the driveway, the side gate, and the back patio each need their own sensor aimed across that specific path. One long-range sensor trying to cover all of them will either miss approaches at the edges or generate constant false triggers from the center. A focused perimeter plan using garage corners, soffits, and fence posts gives more reliable detection than any single wide-angle device.
Landscaping is the most underestimated outdoor trigger. A large shrub or ornamental grass that moves in the wind, positioned within the sensor’s detection zone, will fire the sensor every time a breeze picks up. Trim vegetation back at least 3–4 feet from the sensor’s coverage zone, or reposition the sensor to exclude it. For a detailed perimeter zoning strategy, the JumaluTech perimeter security guide covers garage corners, side yards, and soffit mounting in practical detail.
How do motion sensors integrate with alarms and cameras?
A motion sensor on its own generates an alert. Paired with a camera, an alarm panel, and door contacts, it becomes part of a system that can confirm, escalate, and record an event.
The most effective integration sequence works like this: door and window contacts fire first when a perimeter is breached, the motion sensor confirms interior movement a few seconds later, and the camera captures footage for verification. That layered sequence reduces false alarms at the alarm-dispatch level because a single sensor trigger doesn’t automatically escalate, two independent triggers do.
Most modern alarm panels and smart home hubs support zone-based rules. Assign each sensor to a zone (front entry, back hallway, garage) and set different response rules per zone. A motion trigger in the garage at 2 AM warrants an immediate alert; the same trigger in the living room at 7 PM probably doesn’t. Alarm system basics at Safes and Security Solutions explains how panel zones and monitoring interact in plain terms.
For camera placement that complements your sensor layout, the security camera setup guide at Safes and Security Solutions covers field-of-view coordination so cameras and sensors cover the same zones without redundant overlap.
How do you keep sensors working reliably over time?
A sensor that worked perfectly at install can drift over months. Dust on the lens, a dead battery, or a shifted mounting bracket are the three most common causes of gradual performance loss.
Lens cleaning: Wipe the sensor lens with a dry microfiber cloth every three to six months. Dust, spider webs, and insect residue accumulate on the lens and reduce sensitivity. Outdoor sensors need cleaning more frequently, especially after pollen season or heavy rain.
Battery replacement: Battery-powered sensors typically show a low-battery indicator in the app before they fail, but don’t wait for the warning. Replace batteries annually as a standard maintenance cycle, or switch to hardwired sensors in locations where battery access is inconvenient.
Bracket and mounting check: Vibration from nearby doors, HVAC systems, or foot traffic can slowly shift a sensor’s angle over time. Every six months, check that the sensor is still aimed at the correct zone and that the mounting screws are tight. A sensor that has rotated even 10–15 degrees from its original position may be covering the wrong area entirely.
Firmware updates: Smart sensors connected to a hub or app receive firmware updates that can change sensitivity algorithms or add pet-filtering features. Keep the app updated and apply sensor firmware updates when prompted.
What most placement guides get wrong
The conventional advice — “put sensors in corners at 7 feet” — is correct as far as it goes. The part most guides skip is the why, and that gap leads to predictable failures.
Homeowners who follow the height rule but ignore the heat-source rule end up with sensors that trigger every time the furnace kicks on. Those who follow the corner rule but skip the walk-test end up with sensors that look well-placed but have a dead zone right at the door they’re supposed to cover. The placement rule and the test are inseparable.
The other thing most guides understate: false alarms are a security problem, not just an annoyance. A system that cries wolf trains the people monitoring it to ignore alerts. The goal of good placement isn’t just coverage — it’s coverage that the household actually trusts and responds to. A sensor that fires twice a week for no reason will be disabled within a month.
Spending an extra 20 minutes on temporary mounting and walk-testing before drilling pays back every time. It’s the one step that separates a system that works from one that gets turned off.
Security products and support from Safes and Security Solutions
Getting placement right is half the job. The other half is having hardware that performs reliably once it’s mounted. Safes and Security Solutions carries motion sensors, sensor kits, surveillance cameras with cloud storage and mobile alerts, and the mounting hardware to install them properly — all in one place, without the markup of a traditional security integrator.

Whether you’re outfitting a single-family home or managing a multi-unit property, the product range at Safes and Security Solutions covers PIR sensors, dual-technology units, and full camera systems with the specs you need to match the right device to each zone. Browse the full range of home security products or go straight to Safesandsecuritydirect to find sensors, kits, and mounting accessories for your specific setup.
Sources
- TI application note (Ken Nakamura)
- How to Effectively Place Sensors in Your Home | SafeWise
- How to Set Up Smart Home Motion Sensors: Complete DIY Guide - SmartHomeGearReviews
- Lighting
- Motion Sensors Done Right: Placement, Sensitivity, and Timeout Settings – Kaizen Intelligence