

Medical Waste Secure Disposal Steps: A Facility Checklist
Secure medical waste disposal follows eight steps: classify → segregate at source → contain and package → handle safely → store securely → transport with chain-of-custody → treat appropriately → document and retain records. Every step matters, and skipping one creates both regulatory exposure and real safety risk for your staff.
The most important thing to do right now: pull out your facility’s written regulated medical waste management plan and confirm it reflects your current state’s requirements. Medical waste regulation in the U.S. is primarily administered at the state level, so when federal and state rules conflict, follow the stricter one. If you are unsure which applies, contact your state environmental or health agency before your next pickup.
- Classify each waste stream before anything else touches it
- Segregate at the point of generation, not at the storage room
- Contain in compliant, labeled containers immediately
- Handle with appropriate PPE and strict sharps discipline
- Store in a locked, ventilated area within permitted time windows
- Transfer only to a licensed hauler with a completed manifest
- Treat using a method validated for that waste type
- Retain manifests and certificates of destruction per state requirements
Pro Tip: Bookmark your state environmental agency’s medical waste page and set a calendar reminder to check it quarterly. State rules change, and your written plan must stay current.
Key Takeaways
Secure medical waste management requires eight sequential steps, from classification through documented final disposal, with state rules governing the specifics at every stage.
| Point | Details |
|---|---|
| Classify before you touch it | Identify the waste stream at generation; wrong classification creates downstream compliance failures. |
| Segregate at the point of use | Containers must be within arm’s reach during clinical tasks; segregation at the storage room is too late. |
| Chain of custody starts at packaging | Every container needs a generator ID, waste type, date, and seal before it moves anywhere. |
| State rules govern your program | Contact your state environmental and health agency; federal guidance is the floor, not the ceiling. |
| Safes and Security Solutions for secure storage | Pharmacy-grade cabinets and certified safes provide the physical security layer your waste management plan requires. |
Table of Contents
- What are the secure disposal steps for medical waste?
- Step 1: Segregate waste at the point where it is generated
- Step 2: How do you contain and package medical waste for transport?
- Step 3: What PPE and immediate safety steps protect staff during waste handling?
- Step 4: Where and how long can you store medical waste on-site?
- Step 5: How do you verify a licensed hauler and complete the chain of custody?
- Step 6: Which treatment method is right for each waste type?
- Step 7: What records do you need to keep after final disposal?
- Which agencies set the rules for medical waste compliance?
- How do you build and maintain a compliant training program?
- How do you prevent pharmaceutical waste diversion and theft?
- Secure transfer protocols that prevent diversion during waste movement
- Spill cleanup and decontamination procedures for medical waste
- How should your facility respond to a medical waste exposure or leak emergency?
- An operations manager’s perspective on daily waste compliance
- Secure storage hardware for pharmaceutical and high-value waste
- Sources
What are the secure disposal steps for medical waste?
The phrase “medical waste secure disposal steps” describes the procedural sequence that regulated medical waste (RMW) programs follow. The industry term is regulated medical waste management, and it covers every stage from the moment waste is generated to its final, documented destruction.
Your facility generates multiple distinct waste streams, and each one has different handling rules:
- Regulated/infectious waste: Items contaminated with blood or other potentially infectious materials (OPIM), such as used dressings, suction canisters, and blood-soaked materials
- Sharps: Needles, scalpels, lancets, broken glass from the lab; anything that can puncture skin
- Pharmaceutical waste: Expired, unused, or returned medications, including controlled substances subject to DEA rules
- Pathological waste: Human tissues, organs, and body parts without preservatives (formalin-fixed tissue shifts to a different regulatory category)
- Lab/microbiologic waste: Cultures, stocks, and specimens from clinical or research labs
- Trace chemotherapy waste: Items that contacted chemotherapy agents but are not bulk liquid waste (gloves, tubing, empty vials)
- RCRA hazardous waste: Certain pharmaceuticals (P-listed and U-listed drugs) that trigger EPA Resource Conservation and Recovery Act rules, separate from standard RMW
The line between RMW and ordinary solid waste matters financially and operationally. Treating non-regulated waste as RMW inflates disposal costs; treating RMW as ordinary trash creates liability. When a material is borderline, apply the more protective classification and document your reasoning.
Pro Tip: When federal and state rules conflict, adopt the stricter requirement and document the consultation with your state authority in writing. That record protects you during inspections.
Step 1: Segregate waste at the point where it is generated
Segregation at the point of use is the single most consequential step in the entire process. Once a regulated item lands in a general waste bag, the entire bag becomes regulated waste. That mistake multiplies your disposal costs and your compliance risk.
Keep containers within arm’s reach during every clinical task. The container should be visible and reachable without moving away from the procedure. Here is how waste streams map to container types:
| Waste stream | Container type | Color/marking |
|---|---|---|
| Sharps | FDA-cleared, puncture-resistant, lockable | Red or yellow, biohazard symbol |
| Infectious/RMW soft waste | Leak-resistant biohazard bag in rigid outer container | Red bag, biohazard symbol |
| Pharmaceutical waste (non-controlled) | Secure pharmaceutical waste container | Blue or black, “Pharmaceutical Waste” label |
| Trace chemotherapy waste | Chemotherapy-specific container | Yellow, “Chemo Waste” label |
| Pathological waste | Leak-proof container, often refrigerated | Red or biohazard-labeled |
CDC guidance recommends leak-resistant biohazard bags and puncture-resistant sharps containers at the point of use, and that recommendation is the baseline. Many states require more. Wall-mount sharps containers at consistent heights in patient rooms, procedure areas, and labs. Bedside containers work for mobile procedures. Seal sharps containers before they reach full capacity to reduce risk, with stopping well before full generally recommended as the safer practice. Overfilling sharps containers is among the most common causes of safety incidents, and a puncture during transport is entirely preventable.
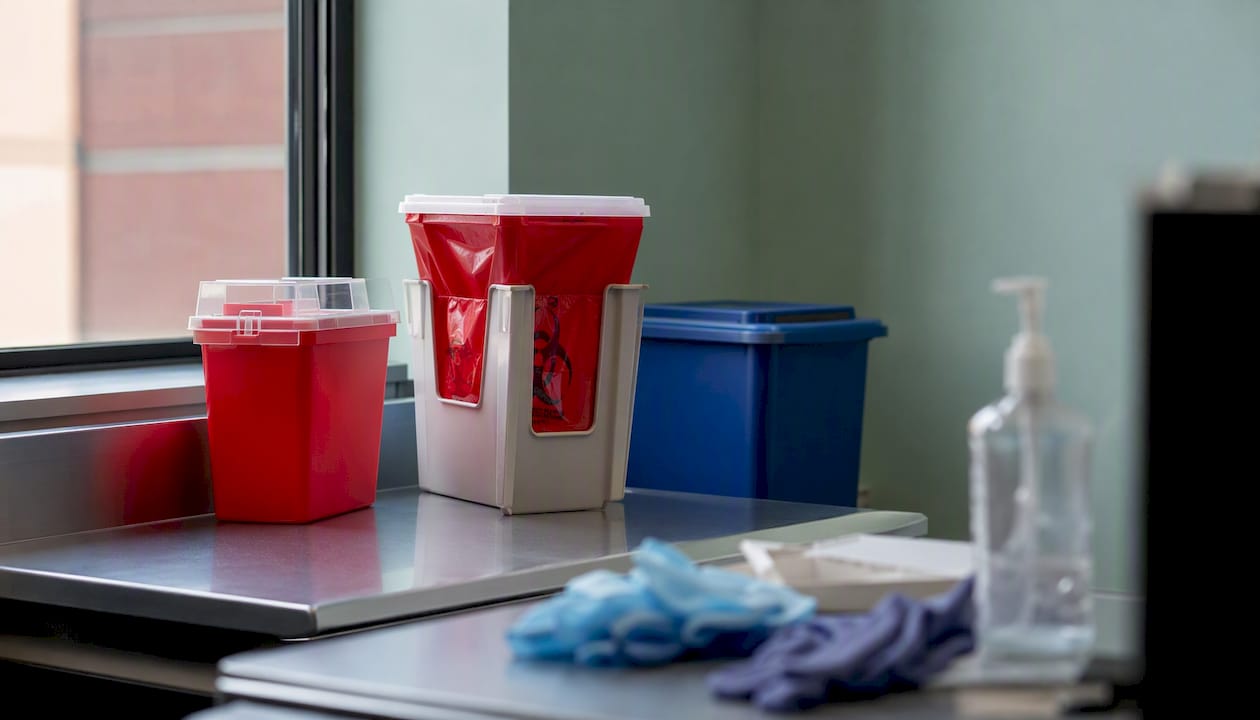
Pro Tip: For mobile procedures (phlebotomy carts, home-health visits), use small portable sharps containers and swap them out before they reach the fill line. Never carry a full container back through a patient area.
Step 2: How do you contain and package medical waste for transport?
Once waste is segregated, the container becomes the primary protection for everyone who handles it downstream. Packaging failures at this stage cause the most serious regulatory violations and the most preventable injuries.
- Sharps containers: Use only FDA-cleared, puncture-resistant containers with lockable lids. Never recap needles by hand. Never bend, break, or remove a needle from a syringe manually. Place used sharps directly into the container immediately after use. Do not overfill.
- Biohazard bags: A single, sturdy, leak-resistant red bag is sufficient for most RMW soft waste. If the primary bag is compromised (torn, wet, or leaking), place it inside a second bag of the same specification before moving it. Use bags sized to fit the outer container without overstuffing.
- Pharmaceutical and trace-chemo containers: These must be tamper-evident and clearly labeled with the waste type. Controlled substance waste requires additional segregation to prevent diversion. Never mix controlled substance waste with general pharmaceutical waste.
- Labeling: Every container leaving a generation point must show the generator’s name and address, waste type, date of generation, and any required handling instructions. Manifests begin here, not at the loading dock.
Secondary containment is required when a primary container shows signs of damage or leakage during internal movement. Store all containers on pallets or shelves, off the floor, and away from floor drains to prevent cross-contamination if a leak occurs.
Step 3: What PPE and immediate safety steps protect staff during waste handling?
PPE selection depends on the waste type and the task. A staff member sealing a sharps container needs different protection than someone cleaning up a spill from a broken biohazard bag.
Standard PPE for routine waste handling:
- Nitrile or latex gloves (puncture-resistant for sharps work)
- Fluid-resistant gown or apron when splash risk exists
- Eye protection (safety glasses or face shield) when handling open containers or performing spill cleanup
- N95 respirator when aerosol-generating procedures are involved or when handling lab cultures
Sharps-specific rules (non-negotiable):
- Never recap a used needle by hand
- Never remove a needle from a syringe manually
- Place sharps directly into the container; do not set them down first
- If a sharps container is full, seal it and replace it before continuing
Spill response sequence:
- Alert others in the area and restrict access
- Don appropriate PPE before approaching the spill
- Cover the spill with absorbent material (paper towels, spill kit granules)
- Apply an EPA-registered disinfectant appropriate for the waste type; allow adequate contact time
- Scoop up all contaminated material and place it in a red biohazard bag
- Clean the area again with disinfectant
- Remove PPE carefully, avoiding self-contamination; wash hands immediately
- Complete an incident report and notify your supervisor
Pro Tip: Post a laminated one-page spill response card at every waste accumulation point. Assign a trained spill responder for each shift and confirm that assignment at the start of every day.
Step 4: Where and how long can you store medical waste on-site?
Storage is where many facilities accumulate compliance violations quietly. Waste sits longer than permitted, containers stack up in unlocked closets, and nobody notices until an inspection.
Storage area requirements:
- Clearly labeled with “Regulated Medical Waste” or “Biohazardous Waste”
- Locked or restricted to authorized personnel only
- Ventilated to prevent odor and pressure buildup
- Containers stored on pallets or shelves, off the floor
- Physically separated from patient care areas, food preparation areas, and clean supply storage
- Pest-proof construction and regular pest-control inspections
Time and temperature limits vary by state, but typical maximums are:
- Room temperature storage: 7 days for most RMW in many states; some allow up to 30 days for small generators
- Refrigerated storage (34–40°F): extends permitted time for pathological waste; check your state’s specific window
- Trace chemotherapy waste: often subject to RCRA satellite accumulation time limits (up to 3 days at the generation point, then moved to a central accumulation area)
Maintain an access log for the storage room. Every entry and exit should be recorded with the date, time, and staff member’s name. If a scheduled pickup is delayed and you are approaching your permitted storage window, escalate immediately to your waste hauler and document the delay in writing.
Step 5: How do you verify a licensed hauler and complete the chain of custody?
A signed manifest is your legal proof that waste left your facility properly. Without it, you remain the responsible party even after the truck drives away.
Before the hauler arrives, verify:
- Current state transporter license for medical waste
- DOT Hazardous Materials registration (if applicable to the waste types being transported)
- Driver identification and authorization
- Proof of insurance
- The hauler’s manifest format matches your state’s requirements
At the time of transfer:
- Confirm all containers are sealed, labeled, and match the manifest quantities
- Scan or record barcode tracking numbers if your hauler uses them
- Both parties sign the manifest; you retain a copy immediately
- Note the time, date, and driver name in your pickup log
Chain-of-custody practices:
- Use numbered, tamper-evident seals on containers where required
- Record seal numbers on the manifest
- Report any broken seals or discrepancies to your hauler and your state agency immediately
- Do not release waste to an unlicensed hauler under any circumstances
A practical operational workflow includes retaining manifests and certificates of destruction as part of the standard pickup process. Facilities that pair strict segregation with clear chain-of-custody practices reduce audit risk and improve traceability during incident investigations.
Pro Tip: Require a certificate of destruction or treatment confirmation for every shipment. Review your hauler’s monthly reports against your own manifest copies and flag any volume discrepancies immediately.
Step 6: Which treatment method is right for each waste type?
Treatment destroys the infectious or hazardous character of the waste before final disposal. The right method depends on the waste stream, your state’s accepted technologies, and whether you treat on-site or send waste to an off-site facility.
| Treatment method | Best suited for | Key considerations |
|---|---|---|
| Autoclave (steam sterilization) | Microbiologic, infectious RMW, lab waste | Validated cycles required; not suitable for pathological or chemotherapy waste |
| Incineration | Pathological waste, chemotherapy waste, anatomical waste | EPA air emission standards apply; modern units require high-temperature combustion and gas-cleaning systems |
| Microwave treatment | Infectious RMW, lab waste | State certification required; validated shredding often paired with microwave exposure |
| Chemical treatment | Liquid infectious waste, lab cultures | Appropriate disinfectant and contact time must be validated; state acceptance varies |
CDC guidance specifies autoclave decontamination parameters for microbiologic wastes, and facilities must retain cycle validation records. EPA model guidelines outline acceptable treatment categories and emphasize that many states require certification or licensing of treatment technologies.
WHO recommends favoring autoclaving or microwave methods over incineration when feasible, because inadequate incineration releases dioxins, furans, and heavy metals. Modern incinerators that meet EPA air standards address those risks, but the capital and operational costs are significant. For most facilities, off-site incineration through a licensed vendor is the practical path for pathological and chemotherapy waste.
Recordkeeping for treatment:
- Retain autoclave cycle logs (time, temperature, pressure, load description) for every run
- Keep spore test results where required by state rules
- Obtain and file certificates of treatment from off-site facilities
- Log any treatment failures and corrective actions taken
Step 7: What records do you need to keep after final disposal?
Documentation is the difference between a compliant program and a defensible one. When a regulator or auditor arrives, your records are your program.
A complete manifest and certificate of destruction should include:
- Generator name, address, and EPA ID (if applicable)
- Transporter name and license number
- Treatment facility name and permit number
- Waste type, quantity, and container count
- Treatment method used
- Dates of pickup, treatment, and destruction
- Signatures of all parties
Retention windows vary by state. Many states require a minimum of three years; some require longer for certain waste types or generator sizes. When in doubt, retain records for five years and store them in a format that survives a document request during an inspection.
Audit practices:
- Review manifests monthly against your internal pickup logs
- Reconcile waste volumes against purchasing and patient-volume data
- Flag any manifest that arrives late, incomplete, or with quantities that do not match your records
- Document corrective actions when discrepancies are found
Pro Tip: Scan every manifest and certificate of destruction the day it arrives and upload it to a secure, backed-up document management system. Paper copies in a filing cabinet are a single flood or fire away from being gone.
Which agencies set the rules for medical waste compliance?
Understanding who regulates what prevents the common mistake of treating federal guidance as the final word.
State primacy is the starting point. The EPA does not generally regulate medical waste at the federal level; states set the rules for segregation, storage, transport, and treatment. Your state environmental agency and state health department are the authoritative sources for your specific requirements. Requirements differ significantly across states, including permitted storage times, accepted treatment technologies, and manifest formats.
Federal agencies and their focus areas:
- CDC: Infection control guidance, sharps safety, and environmental control recommendations for healthcare settings
- OSHA: Worker protection under the Bloodborne Pathogens Standard (29 CFR 1910.1030); exposure control plans, PPE requirements, and training mandates
- EPA: RCRA hazardous waste rules (P-listed and U-listed pharmaceuticals), treatment technology model guidelines, and incinerator emission standards
- DOT: Hazardous materials transport regulations for medical waste shipped off-site (49 CFR Parts 171–180)
- DEA: Controlled substance disposal rules, including authorized collection programs and destruction requirements for expired or unused controlled drugs
Compliance deliverables your program must produce:
- Written regulated medical waste management plan, updated annually or when regulations change
- Training records for every staff member who handles RMW
- Manifests for every pickup, signed and retained
- Treatment certificates or cycle logs for every treatment event
- Incident logs for spills, exposures, and manifest discrepancies
To find your state regulator, search “[your state] medical waste regulations” and look for the state environmental agency or department of health page. Bookmark it. Incorporate its current requirements into your written plan.
For state-level storage law compliance, a state compliance guide can help you cross-reference storage requirements across jurisdictions.
How do you build and maintain a compliant training program?
Training is not a one-time event. Staff turn over, procedures change, and regulations update. A program that was compliant two years ago may not be compliant today.
Core training modules every RMW-handling staff member needs:
- Waste classification and segregation rules for your facility’s specific waste streams
- Container selection, fill-level limits, and sealing procedures
- Sharps safety: engineering controls, no-recap policy, and immediate disposal
- PPE selection and donning/doffing sequence
- Spill response: step-by-step procedure and incident reporting
- Chain-of-custody and manifest completion
- Storage area rules and access controls
Competency verification steps:
- Observed practice during initial onboarding (not just a video and a quiz)
- Annual refresher training with documented sign-off
- Separate competency checks for staff handling chemotherapy waste or controlled substance waste, given the higher regulatory stakes
- Supervisor spot-checks during routine waste handling
Audit checklist and suggested frequencies:
- Monthly: manifest review and volume reconciliation; review training completion rates
- Quarterly: storage area inspection (labels, ventilation, access controls, container condition); sharps container fill-level audit
- Annually: full program audit against current state requirements; review and update the written management plan; verify hauler credentials and contracts
Metrics worth tracking:
- Spill incidents per quarter (target: zero; trend matters more than a single number)
- Overfill or near-miss events for sharps containers
- Manifest discrepancies per pickup cycle
- Training completion rate (target: 100% before any staff member handles RMW independently)
How do you prevent pharmaceutical waste diversion and theft?
Pharmaceutical waste and high-value waste streams carry a diversion risk that ordinary infectious waste does not. A used sharps container is not a theft target. An improperly secured pharmaceutical waste cabinet containing expired controlled substances is.
Physical security measures:
- Locked, tamper-evident containers for pharmaceutical waste at the point of generation
- Bolted pharmaceutical waste cabinets in medication rooms and pharmacies, secured to the wall or floor so they cannot be removed
- Restricted-access rooms or cages for waste awaiting transport, with keycard or combination lock access limited to named, authorized staff
- Surveillance coverage of all pharmaceutical waste storage areas
Administrative controls:
- Access logs for every pharmaceutical waste cabinet, recording date, time, and staff name for every opening
- Dual-control sign-off required for removal of any pharmaceutical waste container from its generation point
- Sealed transfer procedures: containers sealed in the presence of two authorized staff members, seal number recorded before movement
- Documented destruction or return flows for controlled substances, with DEA-required records maintained separately
Combining physical hardware with administrative controls is the most effective approach to diversion prevention. Tamper-evident seals, bolted cabinets, and CCTV coverage address the physical opportunity; access logs and dual sign-off address the administrative gap. Neither works reliably without the other.
For facilities evaluating controlled substance safe options, the key specifications to verify are lock certification, tamper-evident seal compatibility, and bolting provisions. A guide on narcotic safe benefits covers how these features integrate with diversion-prevention programs.
Pro Tip: Log every access to pharmaceutical waste cabinets and require two-person verification for any movement of high-value waste. That paper trail is your first line of defense in a DEA audit.
Secure transfer protocols that prevent diversion during waste movement
Moving pharmaceutical or high-value waste from a generation point to a central storage area is the moment of highest diversion risk. The container is in transit, often carried by a single staff member, and the chain of custody is briefly informal.
Steps for a secure internal transfer:
- Seal the container at the generation point in the presence of a second authorized staff member; record the seal number
- Complete the internal transfer log before moving the container (date, time, waste type, container ID, seal number, staff names)
- Transport directly to the central storage area without stops; do not leave the container unattended in a hallway or elevator
- Confirm the seal is intact on arrival; if broken, treat it as a potential diversion incident immediately
- Log the container into the central storage area inventory; second staff member countersigns
- Notify your compliance officer of any seal discrepancy before the end of the shift
For external transfers to a licensed hauler, the same discipline applies. Verify the hauler’s credentials on arrival, confirm container counts against the manifest before signing, and retain your copy of the manifest before the truck leaves. A discrepancy discovered after the truck departs is far harder to resolve than one caught at the loading dock.
Spill cleanup and decontamination procedures for medical waste
A spill involving medical waste is a contamination event, not just a housekeeping issue. The cleanup sequence matters because doing it out of order can spread contamination rather than contain it.
Step-by-step spill decontamination:
- Restrict the area immediately. Alert nearby staff verbally and place a physical barrier (wet floor sign, tape) before anyone approaches the spill without PPE.
- Don full PPE before entering the spill zone: gloves, gown, eye protection, and face shield if splash risk is present.
- Contain the spill by applying absorbent material from the outside edge inward. Never wipe from the center outward, which spreads contamination.
- Apply an EPA-registered disinfectant appropriate for the waste type. For blood and OPIM, a 1:10 bleach solution or an equivalent EPA-registered tuberculocidal disinfectant is standard. Allow the full manufacturer-specified contact time before proceeding.
- Remove all contaminated material (absorbent, PPE, broken container pieces) and place it in a red biohazard bag. Seal the bag immediately.
- Clean the area again with disinfectant and allow it to dry.
- Remove PPE using the proper doffing sequence to avoid self-contamination. Wash hands with soap and water for at least 20 seconds.
- Complete an incident report documenting the location, waste type, estimated volume, staff involved, and corrective actions taken. Submit it to your supervisor and your infection control officer before the end of the shift.
If the spill involves chemotherapy waste, use a dedicated chemo spill kit (not a standard biohazard kit) and follow your facility’s chemotherapy spill protocol, which typically requires additional respiratory protection and a longer decontamination sequence.
How should your facility respond to a medical waste exposure or leak emergency?
An emergency involving medical waste exposure, whether a needlestick, a container leak during transport, or a spill in a patient area, requires a response plan that staff can execute without stopping to look anything up.
Immediate response priorities:
- Needlestick or sharps exposure: Wash the wound immediately with soap and water for at least 15 minutes. Do not squeeze or suck the wound. Report to occupational health or the emergency department immediately for post-exposure evaluation. Time matters for post-exposure prophylaxis decisions.
- Mucous membrane exposure (eyes, mouth): Flush with clean water or saline for at least 15 minutes. Report immediately.
- Container leak during internal transport: Stop movement, contain the leak, don PPE, and follow the spill response sequence above. Do not continue transporting a leaking container.
- Leak discovered at the storage area: Isolate the area, don PPE, identify the source container, and begin spill response. Notify your environmental health and safety officer and your waste hauler.
Your emergency response plan should include:
- Named first responders for each shift, with backup contacts
- Location of spill kits, PPE supplies, and eyewash stations posted visibly
- Contact numbers for occupational health, the state environmental agency, and your waste hauler posted in the storage area
- A documented post-incident review process to identify root cause and prevent recurrence
Test your emergency response plan at least annually through a tabletop exercise. Staff who have walked through the scenario once respond faster and more accurately when a real incident occurs.
An operations manager’s perspective on daily waste compliance
Running a compliant medical waste program is less about heroic audits and more about consistent daily habits. Here is a practical daily checklist:
Morning storage check: Walk the storage area before clinical operations begin. Confirm the room is locked, containers are properly labeled, no containers are approaching their fill limit, and the access log is current.
Midday sharps rounds: Check sharps containers in high-use areas (procedure rooms, labs, medication rooms) at midday. Swap out any container at or near the 2/3 fill mark before it becomes a problem.
End-of-day manifest verification: Confirm that any pickup that occurred during the day has a signed manifest copy filed. If a pickup was scheduled and did not happen, document it and contact the hauler before leaving.
Three reminders worth repeating to your team: keep containers within arm’s reach during every procedure, never let full containers accumulate waiting for a convenient moment to swap them, and escalate pickup delays immediately rather than hoping the hauler shows up tomorrow.
The hardest part of this job is not the regulations. It is maintaining the discipline when the floor is busy and shortcuts seem harmless. They are not. One overfilled sharps container, one unsigned manifest, one unlocked storage room is all it takes to turn a clean compliance record into a corrective action plan.
Secure storage hardware for pharmaceutical and high-value waste
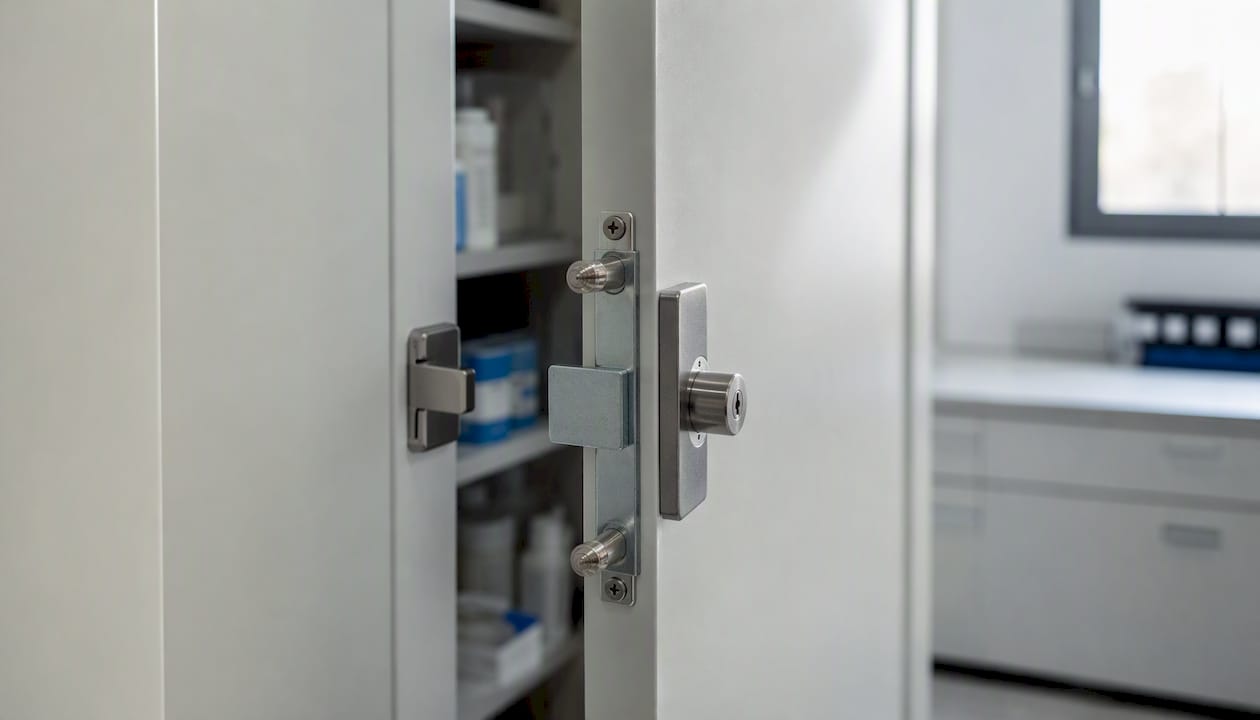
Compliant disposal starts with secure containment, and for pharmaceutical waste, that means hardware built for the purpose. A standard cabinet with a padlock does not meet the physical security requirements that DEA-regulated disposal programs and most state rules expect.
Safes and Security Solutions carries pharmacy-grade safes and medical storage cabinets with the specifications that compliance programs require: certified locking mechanisms, tamper-evident seal compatibility, and bolting provisions for permanent installation. The FireKing medical storage cabinets add one-hour fire protection for facilities storing temperature-sensitive or high-value pharmaceutical materials. These are not disposal solutions; they are the secure holding hardware that keeps waste contained and traceable between generation and pickup.
Hardware choices should be written into your regulated medical waste management plan and your access-control procedures. A cabinet that is not documented in your plan offers physical security but no compliance protection. Contact Safes and Security Solutions for product specifications and quotes matched to your pharmacy, treatment area, or central storage room needs.
Sources
Use these resources to confirm current requirements for your state and waste types:
- I. Regulated Medical Waste | Infection Control
- Medical Waste | US EPA
- Health-care waste (WHO fact sheet)
- How to Dispose of Biomedical Waste: Step-by-Step Guide (2026)
Action item: Search “[your state] medical waste regulations” and locate your state environmental agency’s medical waste page. Confirm your permitted storage times, accepted treatment technologies, and manifest format. Incorporate any differences from federal guidance into your written regulated medical waste management plan before your next scheduled pickup.
This article is general information, not a substitute for advice from a qualified doctor. Consult a qualified healthcare professional about your own circumstances before acting on anything here.
Recommended
- Small Pharmacy Security Guide for Daily Protection – Safes and Security Direct
- When Do Pharmacies Need Safes? A Compliance Guide – Safes and Security Direct
- Office security plan: Step-by-step to a safer workplace – Safes and Security Direct
- Pharmacy Safe Compliance Guide for Buyers – Safes and Security Direct