

Installers: 3 Field Tested LPR Setup Checks
Get three things right and plate capture stops being a guessing game: mount the camera within a recommended vertical angle range and keep horizontal yaw under 25°, shoot at a shutter speed matched to vehicle speed (as fast as 1/1000s for moving traffic), and place your trigger line exactly where the plate sits square and unobstructed. Safes and Security Solutions has watched installers chase phantom software bugs for hours when the real problem was a camera bolted five degrees too steep. Fix placement and exposure first. Everything else is fine-tuning.
TL;DR:
- Ensure the camera is mounted with a vertical tilt of 30° or less and a horizontal yaw under 25° to maintain clear plate recognition.
- Use lenses capable of capturing a minimum plate width of 130 pixels at the trigger point, with optical zoom preferred over digital zoom for sharpness.
- Set shutter speeds to at least 1/1000s for moving traffic and adjust iris and IR illumination to avoid overexposure or motion blur, especially at night.
- Place the trigger line where the license plate appears square and unobstructed, and validate recognition with both parked and live drive-through tests.
- Regularly recheck mounting angles, lens focus, and calibration every three months, and adapt exposure settings for weather conditions like rain, fog, and glare.
Table of Contents
- Camera Placement and Mounting for Reliable LPR Capture
- Choosing Optics and Framing for Sharp Plate Reads
- What Shutter Speed and Exposure Settings Prevent Motion Blur?
- How Do You Configure LPR Software After Installation?
- Testing and Troubleshooting Common LPR Capture Failures
- Quick Commissioning Checklist Before You Leave the Site
- What Are the Privacy and Legal Rules Around License Plate Data?
- How Often Should You Calibrate and Maintain an LPR Camera?
- Adjusting Recognition Settings for Rain, Fog, and Glare
- How LPR Cameras Fit Into a Broader Security or Traffic System
- Lighting Setups That Support Consistent Plate Capture
- Matching Lens Choice to Lane Width and Distance
- Why Setup Discipline Beats Better Hardware
- Get the Right Hardware for a Setup That Actually Works
- Sources
Camera Placement and Mounting for Reliable LPR Capture
Where you bolt the camera decides whether the rest of your configuration even has a chance. Single-lane setups need the vehicle to fill most of the horizontal frame, and one camera should never be asked to cover more than two lanes reliably, according to Milestone’s LPR administrator manual. Push it wider than that and plate pixel density drops below usable thresholds on the far lane.
Distance and height depend entirely on the scenario. Gate and barrier installs run short: Vivotek recommends 2 to 6 meters of distance with the camera mounted low, around 1.5 to 2 meters high. Roadside or gantry setups stretch out to 15 to 30 meters, with height climbing to 3.5 to 6 meters and a rough 1:3 height-to-distance ratio.
Angle limits are non-negotiable. Keep the vertical tilt at 30° or under, horizontal yaw at 20° to 25° max, and for high-speed roads tighten that further, below 15°, since motion and perspective distortion compound at speed.
- Mount on a rigid pole or outrigger arm that won’t sway in wind; vibration blurs plates faster than shutter speed can fix.
- Avoid gate arms, signage, or foliage that clips the plate at the exact moment of trigger.
- On barrier lanes, mount close enough that vehicle queuing doesn’t stack a second car into the frame.
Pro Tip: Walk the site with a tape measure and a level before you ever power the camera on. A 20-minute mounting check saves a return trip once you discover the angle is 8° over spec on a live feed.
Choosing Optics and Framing for Sharp Plate Reads
The lens decides whether the sensor even has a chance at legible characters. Aim for a minimum plate width around 130 pixels, or roughly 20 to 35 pixels per character stroke depending on plate format, a benchmark Digital Watchdog’s MEGApix LPR guidance treats as the floor for consistent OCR. Fall short of that and the recognition engine starts guessing between similar characters like 8 and B.
Focal length should be chosen against your actual distance to the capture point, not eyeballed. Run the numbers with a lens calculator rather than trusting a rule of thumb, since a few meters of error at 20 meters out can shift plate width by dozens of pixels. Single-lane setups often work fine on standard resolution streams; two-lane coverage usually needs a higher-resolution primary stream to keep both lanes above the pixel threshold simultaneously.
- Start framing at a lower resolution to confirm plate position and measured pixel width, then step up resolution only if the target isn’t met.
- Never rely on digital zoom. It stretches pixels without adding real detail. Optical zoom and manual focus lock in sharpness that digital zoom can’t fake.
- Use IR-corrected lenses or an IR-pass filter when running in night mode, since standard glass focuses IR and visible light at slightly different points.
A varifocal lens with true optical zoom gives you the flexibility to dial in framing on site rather than guessing focal length before installation.
What Shutter Speed and Exposure Settings Prevent Motion Blur?
Shutter speed is the setting most installers under-prioritize, and it’s the one that wrecks plate legibility fastest. For vehicles moving at normal road speed, vendor guidance points to a minimum around 1/1000s; slower traffic, like a gated community or a loading dock, can run comfortably at 1/240s to 1/480s.
- Set shutter speed first, based on expected vehicle speed at the capture point, not the camera’s default auto-exposure.
- Adjust the iris to control IR reflection and overall brightness rather than compensating purely through gain, since gain adds visible noise that degrades character edges.
- Lock the camera into permanent night or monochrome mode when IR illumination is present. Mixed day/night switching introduces exposure lag exactly when you need consistency.
- Choose a lower frame rate with higher per-frame quality over a high frame rate with heavy compression. Some vendors specifically recommend JPEG or low-compression streams for the OCR engine to work with.
Statistic Callout: A camera holding steady at 1/1000s eliminates most motion smear on vehicles moving at typical roadway speeds, while the same camera at 1/240s on a fast lane will blur plate characters into an unreadable smudge, per Digital Watchdog’s setup recommendations.
How Do You Configure LPR Software After Installation?
Once the optics and exposure are dialed in, the configuration work moves into software. Draw the recognition area over exactly the zone where the plate will appear as the vehicle approaches, and place the trigger line at the point where the plate sits squarest to the lens, fully visible and not yet clipped by a gate arm or another vehicle. TP-Link’s setup guidance walks through adjusting the image until the plate meets the camera’s built in “optimal LPR size” indicator before finalizing that line.
- Choose a trigger mode that matches the hardware: video-triggered detection works for most open-road and driveway setups, while an external input tied to a loop detector or gate signal suits barrier-controlled lanes.
- Set the trigger interval wide enough to avoid duplicate reads on a single vehicle idling at a gate.
- Enable LPR-only or dedicated recognition mode when the camera supports it, freeing processing resources instead of splitting them with general video analytics.
- Load country-specific plate modules or match lists if the deployment requires access control against a whitelist or blacklist.
Run the camera’s built-in validation step, often called an “Add LPR camera” wizard, which analyzes snapshots and flags whether recognition settings need adjustment. Milestone’s admin manual treats this validation pass as a required step, not an optional extra, and for good reason: a misplaced trigger line is one of the most common setup mistakes installers make.
Pro Tip: Take a manual snapshot at the exact spot you plan to set the trigger line before finalizing anything in software. If the plate isn’t crisp in that still frame, no amount of trigger tuning will fix it.
Testing and Troubleshooting Common LPR Capture Failures
A short, repeatable test routine catches most problems before a system goes live. A parked-vehicle snapshot confirms framing and pixel width. A live drive-through at the expected speed limit confirms shutter and trigger timing hold up under motion. Running both checks in daylight and after dark, as Vivotek’s setup guide recommends, usually reveals within minutes whether a problem sits in the optics or in the exposure settings.
- Motion blur on moving vehicles: increase shutter speed, or if that’s already maxed out for the lighting, move the camera closer to shorten the distance the plate needs to travel through frame.
- Overexposed or washed-out plates at night: close the iris and reduce shutter duration together rather than just dialing down IR intensity, since IR alone can mask an exposure problem that keeps degrading OCR performance.
- Plates clipped by gates, other vehicles, or foliage: reposition the camera or shift the trigger line to a point in the vehicle’s path with a clear sightline.
- Inconsistent recognition under load: enable LPR-only mode to free processing power, or add a separate context camera so the LPR unit isn’t asked to double as a scene-overview camera.
If tuning alone doesn’t resolve a persistent miss rate, the issue is almost always back in placement or lens choice, not a software setting.
Quick Commissioning Checklist Before You Leave the Site
- Vertical angle 15° to 30°, horizontal yaw under 25°, confirmed with a level or app.
- Measured plate width meets the roughly 130 pixel target at the trigger point.
- Shutter speed matches vehicle speed; night mode is locked on and stable.
- Trigger line sits where the plate is square, unobstructed, and fully in frame.
- Validation wizard run and passed on both a parked snapshot and a live drive-through.
What Are the Privacy and Legal Rules Around License Plate Data?
License plate data counts as personally identifiable information in most jurisdictions once it’s linked to a vehicle owner, and that status shapes how long footage can be stored and who can access it. Rules on retention periods, permissible use, and required signage vary by state and by whether the deployment is residential, commercial, or municipal, so installers should confirm local requirements before finalizing a build rather than assuming one client’s setup transfers to the next.
Commercial property managers deploying LPR for access control or parking enforcement typically need a documented retention policy: how long captured plates and images are kept, who can query the match-list database, and how a data request or law enforcement inquiry gets handled. Residential and small business installs carry lighter obligations in most states but still benefit from clear signage indicating recording is in place, both as a legal safeguard and a practical deterrent.
Encryption of stored footage and restricted access to the LPR database matter as much as the camera settings themselves. A system that captures perfect plate reads but stores them in an unsecured, unencrypted stream creates liability the hardware never should have created in the first place. Where a deployment includes a match list or blacklist function, tightly control who can edit that list. An LPR system tied to access control is only as trustworthy as its weakest login credential.
Consult local statutes or legal counsel before deploying any system that stores, shares, or acts on license plate data, particularly for multi-tenant commercial properties where several parties might request access to the logs.
How Often Should You Calibrate and Maintain an LPR Camera?
LPR cameras drift out of spec more from physical changes on site than from software decay. Poles settle, brackets loosen from vibration, and seasonal foliage growth can creep into a frame that was clear during commissioning. A quarterly physical check, confirming mounting angle, lens focus, and sightline, catches most of these before they cause a measurable drop in recognition rate.
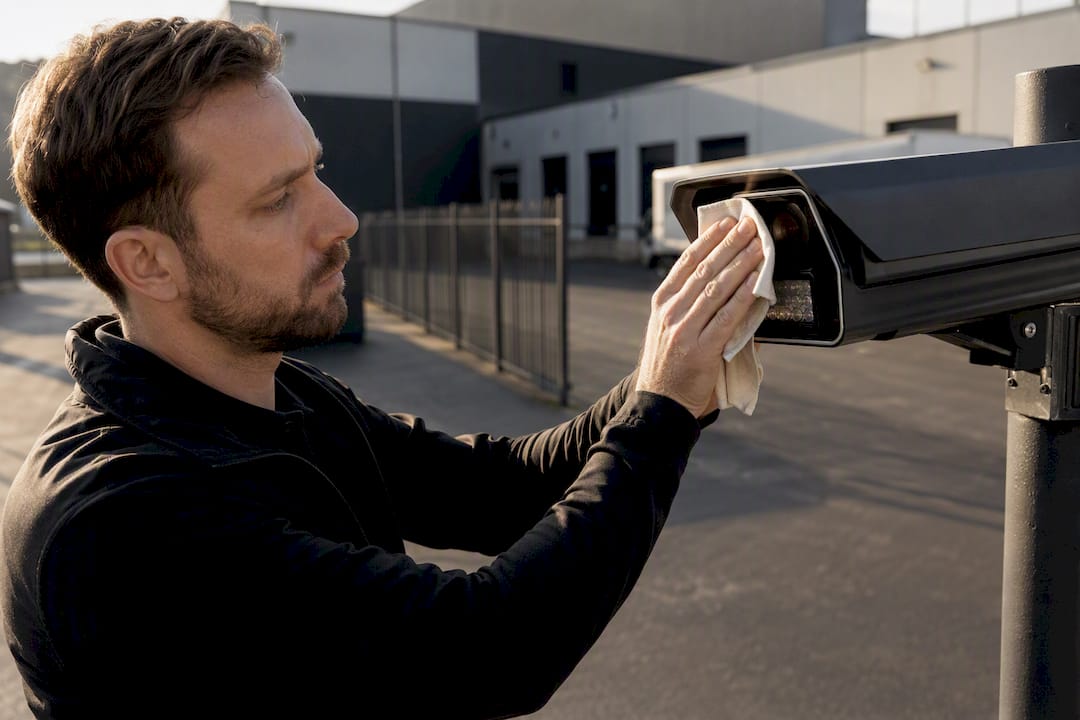
IR illuminators and lens housings collect dust, grime, and in colder climates, frost or condensation, all of which scatter infrared light and soften plate contrast exactly where sharpness matters most. Cleaning the lens and IR window on a routine schedule, monthly in high-traffic or high-dust environments, keeps the illumination even across the frame.
Software-side calibration deserves the same attention as the hardware. Re-run the validation wizard whenever recognition rates start slipping, whenever lighting conditions change seasonally, or after any firmware update that touches the recognition engine. A camera that passed validation in June under summer sun angles may need a second pass in December once the sun sits lower and creates glare at a different time of day.
Keep a simple log of calibration dates, firmware versions, and any parameter changes per camera. On a property with a dozen or more LPR units, that log is the difference between diagnosing a single misbehaving camera in minutes and re-testing an entire system from scratch because nobody remembers what changed and when.
Adjusting Recognition Settings for Rain, Fog, and Glare
Weather is where a well-tuned LPR setup earns its keep, because rain, fog, and glare all attack the same thing: plate contrast. Heavy rain scatters IR illumination and can wash out the exact pixel edges the recognition engine depends on, so many installers slightly increase IR intensity during wet conditions while watching for overexposure on close-range plates, adjusting iris in tandem rather than cranking IR alone.
Fog behaves differently. It scatters light broadly rather than reflecting it back sharply, which tends to reduce effective contrast regardless of IR power. In persistent fog conditions, shortening the effective capture distance, by adjusting the trigger line closer to the camera, often produces more reliable reads than trying to compensate purely through exposure settings.
Low-angle sun glare, especially at dawn and dusk on east or west-facing lanes, can wash out a plate even in otherwise perfect weather. This is one of the few conditions where mounting position matters more than any software fix. If a lane consistently fights glare at certain hours, that’s a placement problem, not a settings problem, and it belongs back in your mounting review.
Some LPR platforms include a wide dynamic range or backlight compensation mode built for exactly this kind of high-contrast lighting. Test any weather-specific setting during the actual conditions it’s meant for rather than assuming the default profile handles it. A system tuned only on clear days will surprise you the first time a storm rolls through.
How LPR Cameras Fit Into a Broader Security or Traffic System
An LPR camera rarely operates alone. Most installations feed plate reads into an access control system, a parking management platform, or a broader video management system running alongside general surveillance cameras. Getting that integration right matters as much as the camera settings themselves, since a perfectly tuned LPR feed is only useful if the data reaches the system that acts on it.
For gate and barrier applications, the LPR camera typically ties into the same controller handling loop detectors and gate signals. Coordinating LPR triggers with the physical gate hardware, including which system fires first and how the two communicate, prevents scenarios where a gate opens before the plate read completes or a vehicle sits waiting on a system that never triggered. Installers working on gate integration benefit from understanding the access control hardware itself, not just the camera side of the equation.
Pairing an LPR unit with a standard context or overview camera rounds out the picture. LPR cameras are tuned narrowly for plate contrast, which means they capture very little useful detail about the vehicle, driver, or surrounding scene. A second camera covering the wider area gives investigators and property managers the visual context that a monochrome, tightly cropped LPR feed simply can’t provide on its own.
Match-list integration deserves its own attention during commissioning. Whether the LPR system feeds a residential gate whitelist or a commercial parking enforcement platform, test the actual handoff between plate recognition and the downstream action, not just the recognition accuracy in isolation.
Lighting Setups That Support Consistent Plate Capture
Good lighting for LPR looks almost nothing like good lighting for general surveillance. Where a standard security camera benefits from even, natural-looking illumination, an LPR setup wants strong, direct IR light aimed precisely at the plate zone, with enough intensity to overpower ambient light without blowing out the reflective plate surface.
Dedicated IR illuminators, either built into the camera housing or mounted separately, give installers more control over throw distance and angle than relying on a camera’s built-in IR array. Separate illuminators matter most on longer-distance roadside setups, where onboard IR often can’t reach the 15 to 30 meter distances those installs require.
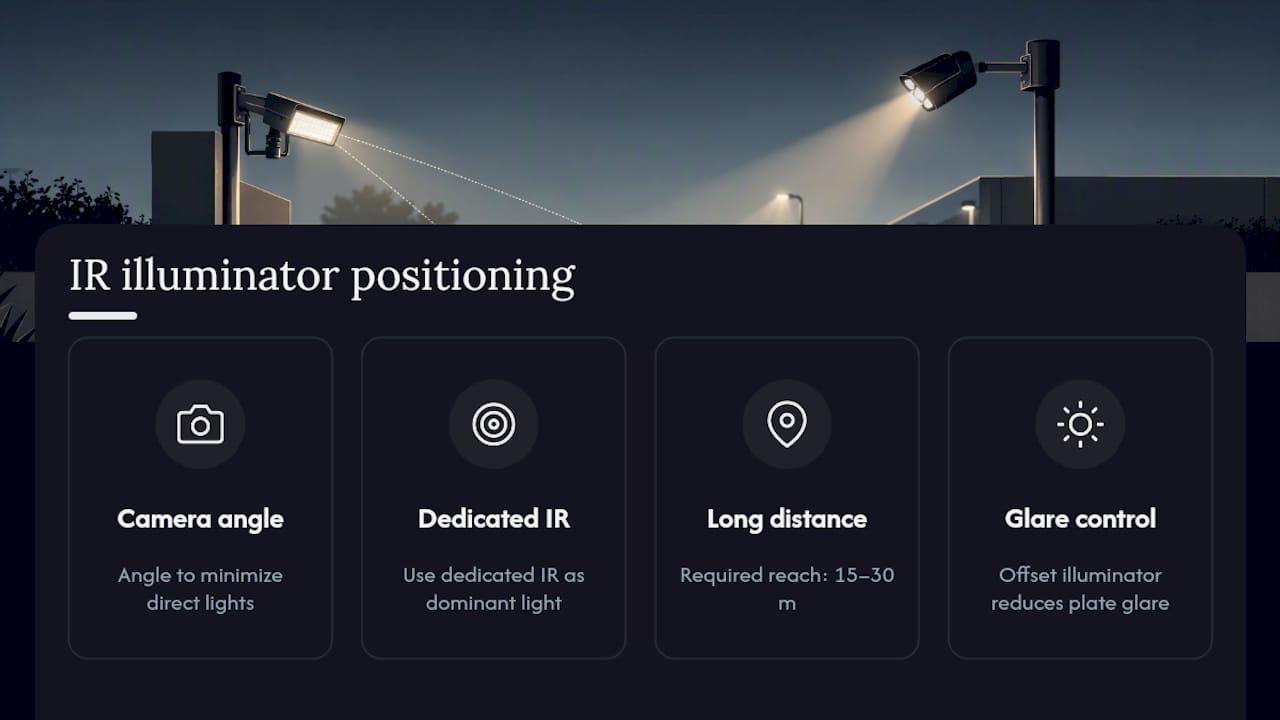
Position illuminators to avoid direct reflection off retroreflective plate coating back into the lens at an angle that causes hot spots. A slight offset between the illuminator and the lens axis, rather than a perfectly coaxial mount, often reduces glare from reflective plates and headlights alike.
Ambient lighting still matters, even in a system built around IR. Streetlights, headlights from oncoming traffic, and building floodlights can all introduce inconsistent exposure if they fall within the camera’s field of view. Where possible, angle the camera to minimize direct light sources entering frame, and rely on the dedicated IR source as the dominant, controlled light for the plate zone itself.
Matching Lens Choice to Lane Width and Distance
Lens selection comes down to a straightforward relationship: wider lanes and longer distances need longer focal lengths to keep the plate large enough in frame, while narrow, close-range lanes need shorter focal lengths to avoid overshooting the target and losing the vehicle’s width in the process.
A single residential driveway or a narrow gate lane, typically within that 2 to 6 meter gate-scenario range, works well with a shorter fixed or narrow varifocal lens, since the short distance already puts plates well within pixel-width targets. Multi-lane commercial entrances or roadside deployments at 15 to 30 meters need a longer focal length, often paired with a higher-resolution sensor, to hit the same pixel-width targets across a much greater distance.
Varifocal lenses give installers room to correct for site-specific distance without swapping hardware, which matters when the as-built distance doesn’t perfectly match the plan drawings. A motorized varifocal lens with real optical zoom lets you fine-tune focal length on site after confirming actual measured distance, rather than committing to a fixed lens based on estimated numbers that don’t always survive contact with the real installation.
Wide lanes covering two directions of traffic sometimes tempt installers toward a single ultra-wide lens to capture everything at once. Resist that instinct. Spreading one lens across two lanes usually means neither lane holds enough plate width for reliable OCR, and two properly lensed single-lane cameras almost always outperform one overachieving wide-angle unit.
Why Setup Discipline Beats Better Hardware
The gap between a system that reads plates reliably and one that frustrates everyone involved rarely comes down to camera quality. It comes down to whether someone measured the angle, checked the pixel width, and validated the trigger line before calling the job done. Skipping that discipline is the single most common reason a perfectly capable camera underperforms in the field.
Pairing an LPR unit with a dedicated overview camera rounds out most installs Safes and Security Solutions sees succeed long term, since plate data alone rarely tells the full story of an incident. Get the angle, the shutter, and the trigger line right, and the rest of the configuration falls into place fast.
— Safes and Security Solutions
Get the Right Hardware for a Setup That Actually Works
No amount of shutter-speed tuning fixes a camera that wasn’t built for the job. Safes and Security Solutions stocks LPR-capable camera bodies, IR illuminators sized for gate and roadside throw distances, varifocal lenses for on-site focal adjustment, and the mounting hardware that keeps a pole-mounted unit from drifting out of angle spec after the first storm.

Pairing the right camera body with the right lens and illuminator up front saves the troubleshooting cycle this guide just walked through. If your property already runs a broader security setup, a properly specified LPR camera integrates alongside existing surveillance rather than replacing it, giving you plate-level detail on top of general coverage.
Browse current camera and lighting options, or if your priority right now is securing valuables once the property side is locked down, the American Security BFS2214 burglary and fire safe rounds out a complete asset-protection setup alongside surveillance hardware. Reach out for a product consultation before you finalize a parts list, and get the mounting height, lens, and illuminator matched to your actual site distances before installation day.
Sources
- MEGApix LPR - Best Practice and Setup Recommendations
- Milestone XProtect LPR administrator manual (2025r1)
- IP Camera Setup for ALPR (Vivotek)
- How to adjust the image for a license plate recognition camera | TP-Link