

Evidence Room Safe Installation Guide: DIY or Hire a Pro
TL;DR:
- Proper safe installation relies on correct anchoring and location to meet insurance and safety standards.
- Professional help is recommended for heavy, in-floor, or complex installs, especially when cutting slabs or handling reinforced concrete.
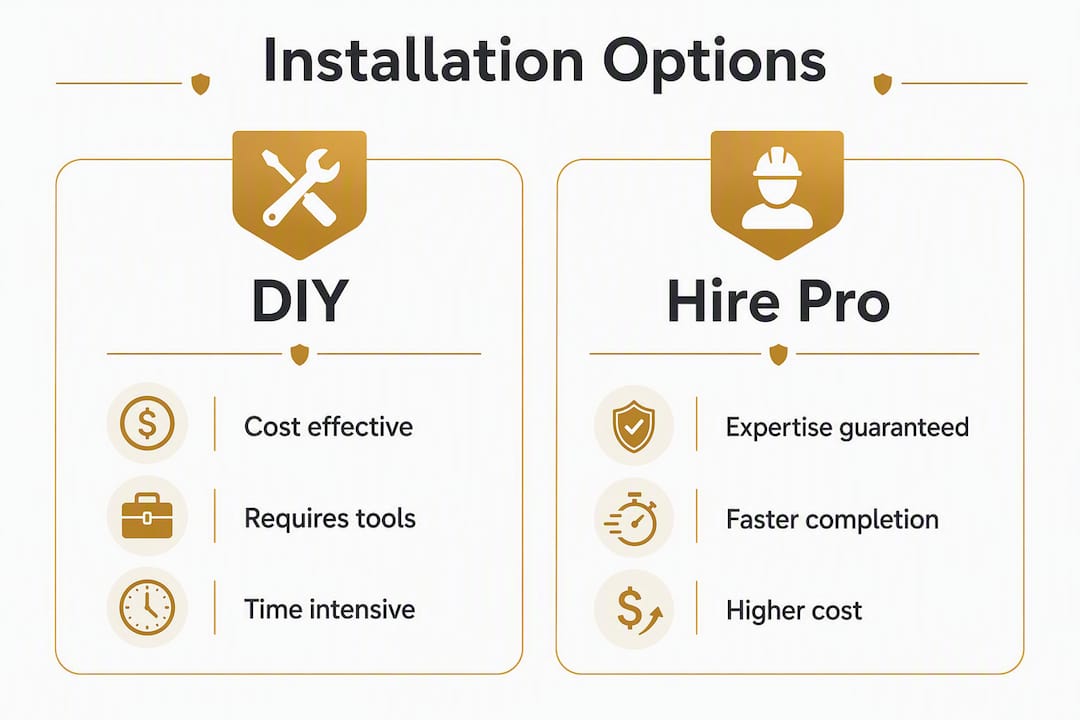
Install and anchor a rated in-floor, wall, or bolt-down safe so it meets your insurer’s and manufacturer’s specifications. For light bolt-down freestanding safes on solid wood or concrete floors, a competent DIYer can handle the job. Hire a licensed installer for in-floor slab recesses, post-tension concrete, or any safe exceeding your floor’s structural capacity; consider Security Camera Installation By Electricians for professional surveillance and alarm integration at your safe location.
Before you touch a drill, run through these four checks:
- Verify the UL or ETL rating on the safe itself — fire-hour rating, UL TL-15/TL-30 burglary rating, or B-rate/C-rate body construction, depending on what your insurer requires.
- Confirm insurer minimums before purchasing. Insurance policies frequently specify construction or rating minimums, and a safe that falls short can result in a denied claim.
- Check structural capacity of the floor or wall cavity where the safe will sit.
- Scan for hidden utilities — plumbing, radiant heat lines, and electrical conduit — before cutting or drilling anything.
Safes and Security Solutions stocks rated safes across every category covered in this guide, from fireproof bolt-down models to commercial in-floor units, with documentation to support insurance claims.
Table of Contents
- What should you check before installing a safe?
- What tools and anchors do you need by substrate?
- Step-by-step installation for bolt-down, wall, and in-floor safes
- When should you hire a professional installer?
- What installation mistakes cause the most problems?
- How do you maintain a safe after installation?
- What do insurers and building codes require for rated safes?
- Key Takeaways
- Why installation quality is the part most buyers underestimate
- How Safes and Security Solutions can help you get this right
- Useful sources for deeper reference
What should you check before installing a safe?
Good installation starts two weeks before you pick up a drill. The decisions you make during planning — location, model, and site prep — determine whether the safe performs as rated or becomes a liability.
Location trade-offs
Interior rooms away from exterior walls give you the best combination of concealment and fire protection. Basements work well for in-floor installs, but only with a moisture barrier. Avoid garages (temperature swings corrode locks), kitchens (fire-source proximity), and anywhere a customer or visitor can observe the safe during normal business hours. Location errors are the single biggest preventable risk to long-term performance and insurer coverage. See these home safe placement tips for a room-by-room breakdown.
Measure before you order
For wall safes, measure stud spacing (typically 16 or 24 inches on center) and confirm cavity depth. Most wall safes need 3.5–5 inches of depth, which standard 2x4 framing provides, but steel-stud commercial walls require a different approach. For in-floor installs, measure slab thickness and check for post-tension cables before assuming you can cut. For bolt-down freestanding safes, measure door swing clearance to ensure the safe can open fully.
Rating and insurance check
Fire ratings vary significantly — a one-hour rating at 1,700°F protects paper documents, but digital media needs a lower internal temperature threshold. Confirm your insurer’s minimum before purchase, not after. Cash-handling businesses should also consider deposit safes, which let staff drop cash without accessing the main compartment.
Pro Tip: Rent a concrete scanner (also called a GPR scanner) before any slab work. Cutting a post-tension cable can cause catastrophic slab failure — it is not a risk worth skipping $75 in rental fees.
What tools and anchors do you need by substrate?
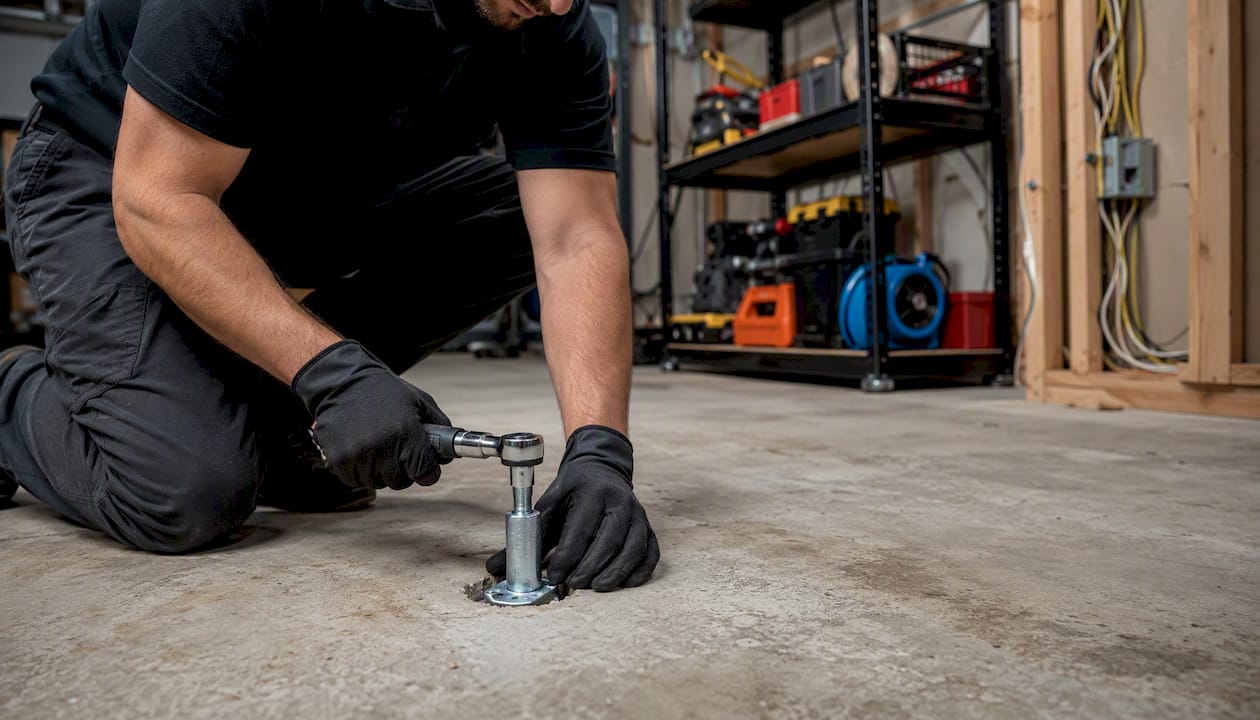
The substrate determines everything. A hammer drill that handles wood subfloors is useless on a 4-inch concrete slab.
| Substrate | Core Tools | Anchors / Hardware |
|---|---|---|
| Concrete slab | Rotary hammer, masonry bits, concrete scanner | Wedge anchors or epoxy-set anchors, moisture barrier |
| Wood subfloor | Drill/driver, jigsaw, level | Lag bolts, threaded rods, doubled-joist framing |
| Wall (wood studs) | Stud finder, drywall saw, drill | Lag screws, backer plate, through-bolts |
| Wall (steel studs) | Metal-cutting blade, stud finder | Self-drilling screws, backer plate, toggle anchors |
| In-floor recess | Wet-cut diamond blade saw, rebar, forms | Concrete, rebar cage, moisture barrier |
Additional items for every install:
- Torque wrench (to hit manufacturer anchor specs — guessing is how anchors loosen)
- Torpedo level
- Tape measure and pencil
- Safety glasses and hearing protection
- Anchor hardware matching the safe’s weight class (manufacturer specs list minimum diameter and embedment depth)
Pro Tip: For safes over 200 lb, use epoxy-set anchors in concrete rather than mechanical wedge anchors. Epoxy anchors resist vibration and pull-out forces better under sustained load — relevant if the safe sits in a commercial space with foot traffic or machinery nearby.
Step-by-step installation for bolt-down, wall, and in-floor safes
Bolt-down freestanding safe
- Position the safe in the chosen location and mark the anchor-hole centers through the pre-drilled base holes.
- Move the safe aside. Drill anchor holes to the diameter and depth specified in the manufacturer instructions — typically 3/8-inch to 1/2-inch diameter, 2.5–3.5 inches deep in concrete.
- Clear debris from holes. Insert anchors (wedge or epoxy type per substrate).
- Set the safe back over the holes and hand-thread the anchor bolts.
- Torque to manufacturer specification with a torque wrench. Do not over-torque — stripped anchors in concrete are difficult to repair.
- Test for wobble by pushing the safe from each side. Zero movement is the target.
Wall safe
- Locate studs and mark the rough opening. Cut drywall carefully — avoid wiring runs.
- Build solid blocking between studs if the safe’s width exceeds one stud bay. Use doubled lumber or steel angles for commercial installs.
- Slide the safe box into the cavity and shim it level front-to-back and side-to-side.
- Fasten through the safe’s mounting flanges into framing with lag screws or through-bolts backed by a steel backer plate.
- Repair drywall around the safe and finish flush so the door sits level. Photograph the finished install before any artwork or concealment goes up.
For detailed framing specs, the wall safe installation guide from Safes and Security Solutions covers blocking configurations with photos.
In-floor safe (concrete slab)
A properly installed in-floor safe sits below finished floor level and is encased in concrete, which adds thermal mass and makes removal noisy and time-consuming for any burglar.
- Scan the slab for rebar, post-tension cables, and utilities. Stop immediately if you detect post-tension cables — hire a structural engineer.
- Mark the cut outline, allowing for the concrete surround (typically 3–4 inches on each side of the safe body).
- Cut the slab with a wet-cut diamond blade saw. Excavate soil as needed to accommodate the safe’s depth.
- Build a rebar cage around the safe position and set the safe level inside the form.
- Pour concrete around the safe, following manufacturer recommendations for strength and curing before loading.
- Finish flush with the surrounding floor. Test the door swing and lock function before installing any floor covering.
Pro Tip: Always test the lock and battery on an electronic safe before the concrete cures. Fixing a misaligned door or dead battery after the pour means cutting concrete again.
When should you hire a professional installer?
Hire a licensed installer or locksmith when any of these apply:
- The install involves cutting an existing concrete slab or any post-tension or reinforced concrete
- The safe weighs more than 200–500 lb and the floor framing has not been assessed by a structural engineer
- The install requires a building permit or structural engineer sign-off
- The location requires electrical or plumbing work to accommodate the safe
- The safe uses a complex electronic or biometric lock that requires professional programming
Professional commercial installers provide site assessment, concrete cutting, rebar work, moisture-proofing, and a finished installation with documentation that supports insurance claims.
Typical cost estimates (ranges only — actual quotes vary by region and access):
- Bolt-down install on existing concrete or wood typically costs a modest range depending on region and access.
- Wall safe install with framing and drywall repair generally falls within a moderate cost range subject to local conditions.
- In-floor recess installations involving slab cutting and concrete pouring typically cost $400–$1,200 depending on region and access.
- Structural engineer review or permit often adds an extra cost depending on project scope and locality.
When evaluating quotes, ask for proof of insurance, anchor hardware specs, installation photos, and a written installation certificate. That certificate is what your insurer will request if you file a claim.
What installation mistakes cause the most problems?
Common errors and how to fix them:
- Placing the safe near a sales counter or in a damp backroom — the most frequent commercial mistake, increasing both observation risk and corrosion
- Skipping moisture-proofing in basements or on-grade slabs, which corrodes anchor bolts and lock mechanisms within a few years
- Under-anchoring: using fewer bolts than the manufacturer specifies, or anchoring into drywall alone without hitting framing
- Forcing the door or lock during installation, which damages mechanisms and voids warranties
| Symptom | Probable Cause | Fix |
|---|---|---|
| Safe wobbles after install | Under-torqued or wrong anchor type | Re-torque; replace with correct anchors |
| Door misaligned, won’t close flush | Safe not leveled during install | Shim base; re-anchor level |
| Corroded anchor bolts | No moisture barrier on slab | Remove safe, apply barrier, replace hardware |
| Electronic lock unresponsive | Dead battery or damaged wiring | Replace battery; call locksmith if wiring issue |
Pro Tip: Photograph every stage of installation — anchor holes, hardware in place, and the finished install. Save the manufacturer’s instruction sheet with those photos. This packet is your insurance claim’s first line of defense.
How do you maintain a safe after installation?
Maintenance is short but non-negotiable if you want the safe to perform as rated years from now.
- Quarterly: Open and close the safe, test the lock, and check that the door seals fully.
- Every 6–12 months: Replace batteries in electronic locks before they fail — a dead battery at the wrong moment is a real problem.
- Annually: Check anchor bolt torque. Vibration and seasonal movement loosen hardware over time.
- After any flood or major moisture event: Inspect anchor bolts and interior for corrosion. Replace hardware showing rust.
Document condition on delivery, photograph the installation, and keep inspection logs and receipts as standard practice. If a lock fails intermittently, or you notice any structural movement around the safe, schedule a professional inspection before the next use.
What do insurers and building codes require for rated safes?
Insurers in the U.S. typically require documented proof of the safe’s rating and its installation method before paying a claim. The ratings that matter most:
- UL fire-hour ratings (1-hour, 2-hour) and the temperature class — confirm your insurer accepts the specific rating on your safe
- UL TL-15 or TL-30 burglary ratings for high-value commercial contents
- B-rate or C-rate body construction for basic commercial cash safes
- Deposit safe standards for retail and cash-handling businesses that need chain-of-custody documentation
Insurance documentation checklist:
- Written confirmation of your insurer’s minimum safe rating
- Purchase receipt showing the safe’s model and rating
- Installation photos showing anchoring method and location
- Installation certificate from a professional installer (if applicable)
Building permits may be required when cutting a slab, altering a fire-rated assembly, or installing a safe exceeding local structural load limits. Check with your local building department before starting any slab work. Skipping this step can complicate both insurance claims and future property sales.
Keep all installation documentation in a separate, off-site location — not inside the safe itself.
Key Takeaways
Correct anchoring, location, and moisture protection are the three factors that most often determine whether a safe installation holds up to a real-world threat or an insurance claim.
| Point | Details |
|---|---|
| Verify ratings before purchase | Confirm your insurer’s minimum UL fire or burglary rating before ordering any safe. |
| Location determines long-term performance | Interior rooms away from moisture and high-traffic areas prevent corrosion and reduce observation risk. |
| Match tools and anchors to substrate | Concrete installs need rotary hammers and wedge or epoxy anchors; wood subfloors need lag bolts and doubled joists. |
| Hire a pro for slab and heavy installs | In-floor concrete recesses typically cost $400–$1,200 and require skills most DIYers should not attempt. |
| Safes and Security Solutions | Stocks rated safes with documentation support and installation guidance to help you meet insurer requirements. |
Why installation quality is the part most buyers underestimate
Most people spend real time choosing the right safe — comparing fire ratings, lock types, and capacity — and then rush the installation. That’s the wrong order of priorities. A UL-rated safe bolted to a single layer of drywall with no framing contact offers almost no real protection. The rating on the door means nothing if the anchoring fails.
The other thing worth saying plainly: moisture is a slow killer that most installation guides treat as an afterthought. A safe installed directly on a concrete slab without a moisture barrier will experience corrosion on anchor bolts over time in many U.S. climates. The lock mechanism follows. By the time the problem is visible, the repair cost often exceeds what a proper install would have cost upfront.
Professional installation is not about paying someone to do something you could do yourself. It is about getting a finished result that holds up when it matters — during a fire, a break-in, or an insurance claim. For in-floor installs especially, the concrete work, rebar, and moisture-proofing require skills and equipment that are genuinely outside most homeowners’ toolkit. The $400–$1,200 cost range for a professional in-floor install is a fraction of what a denied insurance claim or a compromised safe costs.
How Safes and Security Solutions can help you get this right
Choosing the right safe and installing it correctly are two decisions that work together. Safes and Security Solutions carries the full range of rated safes covered in this guide — bolt-down, wall, in-floor, deposit, and commercial models — each with clear rating documentation so you can confirm insurer compliance before purchase.
Every purchase comes with manufacturer installation instructions and the product documentation your insurer will ask for. For readers who need installation support, Safes and Security Solutions can connect you with installation referrals and provide the certificates and photos that support a clean insurance claim. Browse the full safe catalog to match your insurer’s rating requirements, or use the commercial safe buying guide to narrow your options by use case. When you’re ready to buy or need a quote, the product pages include direct purchase options with secure checkout.
Useful sources for deeper reference
- Guide to Floor Safe Installation and Security — SLK: Covers location selection, deposit safe recommendations, and insurance rating requirements for commercial clients.
- Commercial Safes: Buying & Installation Guide — Action Lock Doc: Explains fire-rating differences and the mechanical damage risks of improper installation.
- How to Install and Secure a Fireproof Safe — GuardaSafe: Describes professional installer services including moisture-proofing and documentation.
- How to Install a Safe — Market.com: Practical overview of floor-mounted, wall-mounted, and cabinet safe installation with tool lists.